Keynote
Keynote, Apple's dynamic presentation app for iPads, delivers a captivating platform for creating and delivering impactful presentations. Craft visually stunning slideshows effortlessly. For further assistance or additional tips, explore our dedicated help section to make the most out of your Keynote presentations.
- How To Fix Keynote/Pages "Needs Update"
- How to Change the Size and Shape of a Presentation in Keynote
- How To Change the Presentation Background in Keynote
- How to Embed Web Videos in Keynote
- How To Collaborate on a Presentation in Keynote
- How To Customize the Toolbar in Keynote
How To Fix Keynote/Pages "Needs Update"
Difficulty - Medium
The Issue
When you open Keynote or Pages, the screen shows that the application "needs an update". This document shows the fix:
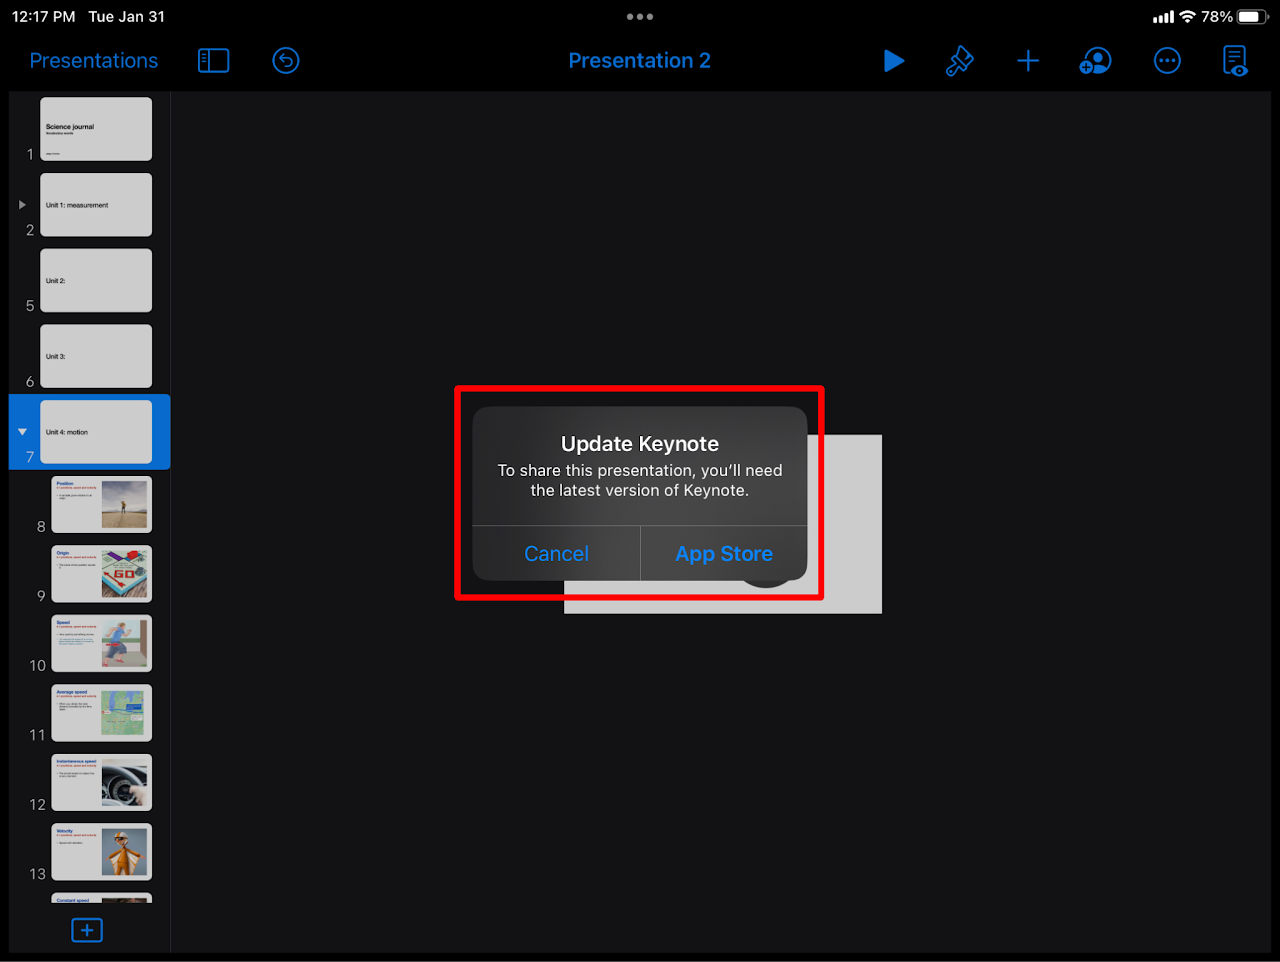
Step 1 - Delete Keynote/ Pages
Article/ Instructions Here
All files saved in keynote or pages NEED to be saved elsewhere. By deleting these applications, you run the risk of deleting files as well.
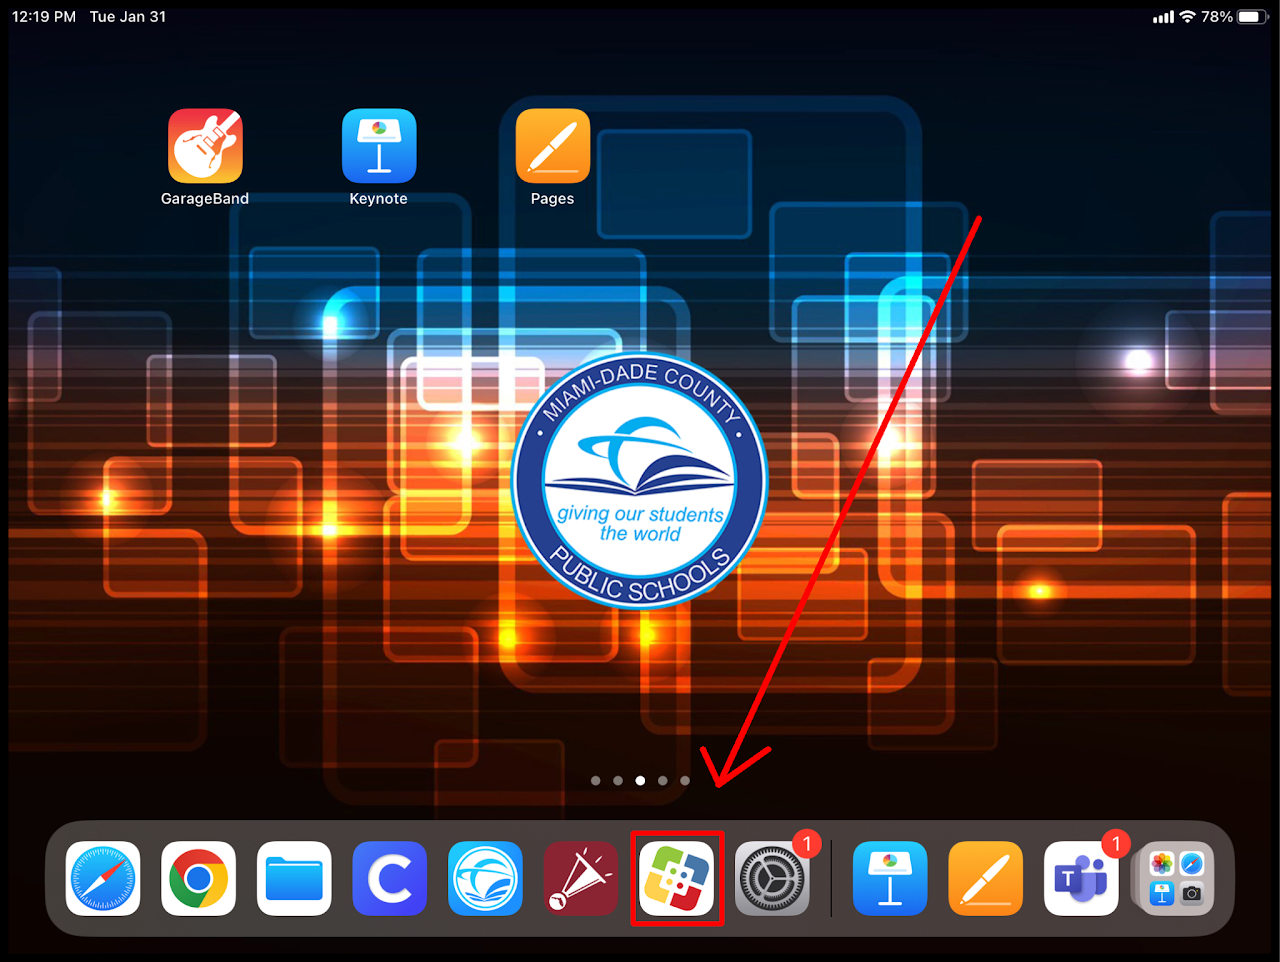
Step 2 - Open "Self Service"
Open the self service app on your iPad.
Step 3 - Re-Install Keynote/Pages
Find the application that needs to be reinstalled on the list. Tap reinstall.
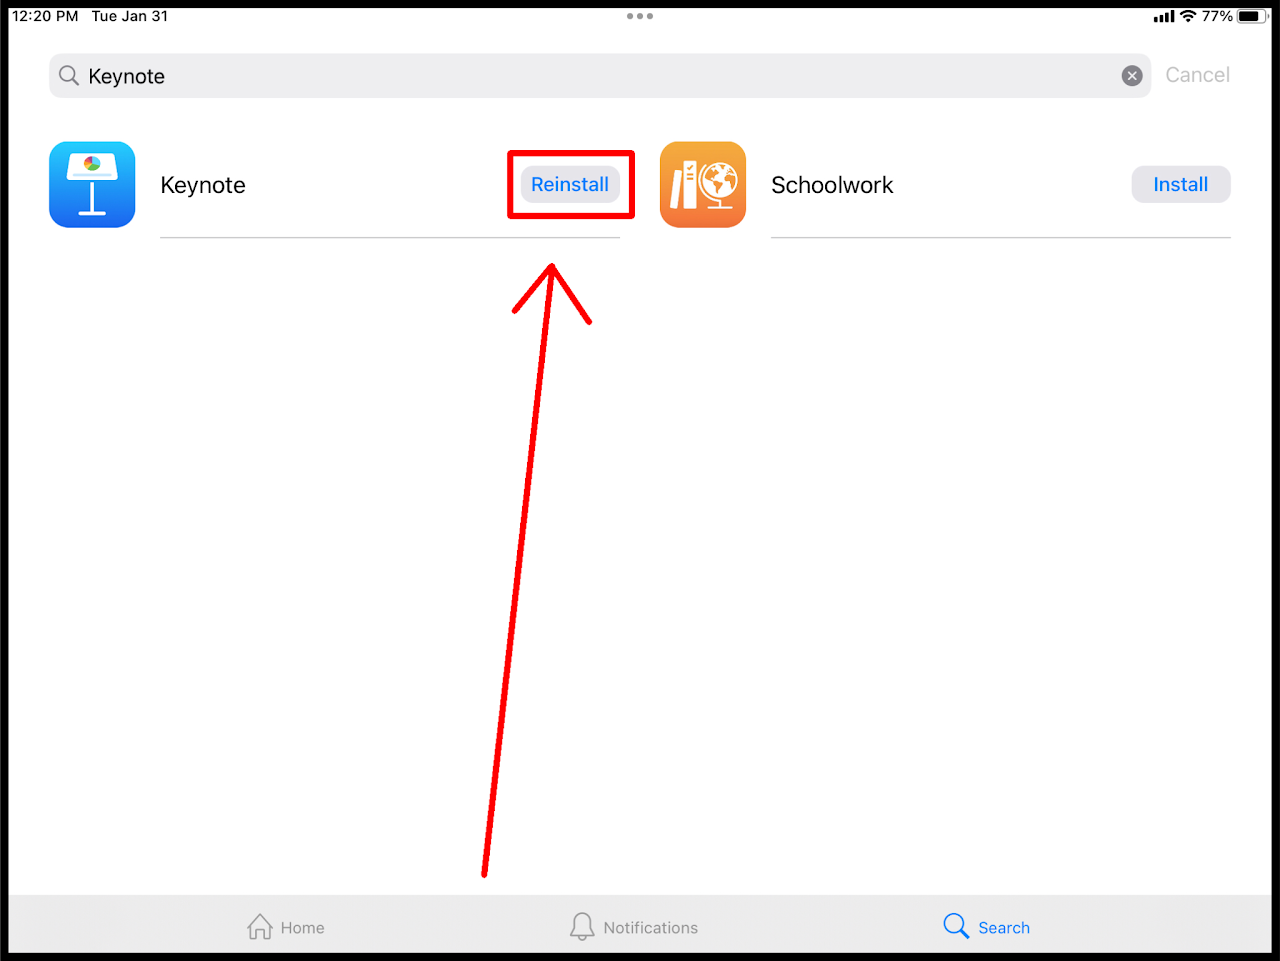
Make sure the app is FULLY UNINSTALLED before reinstalling. Reinstalling without a complete uninstall will be problematic.
How to Change the Size and Shape of a Presentation in Keynote
Difficulty - Easy
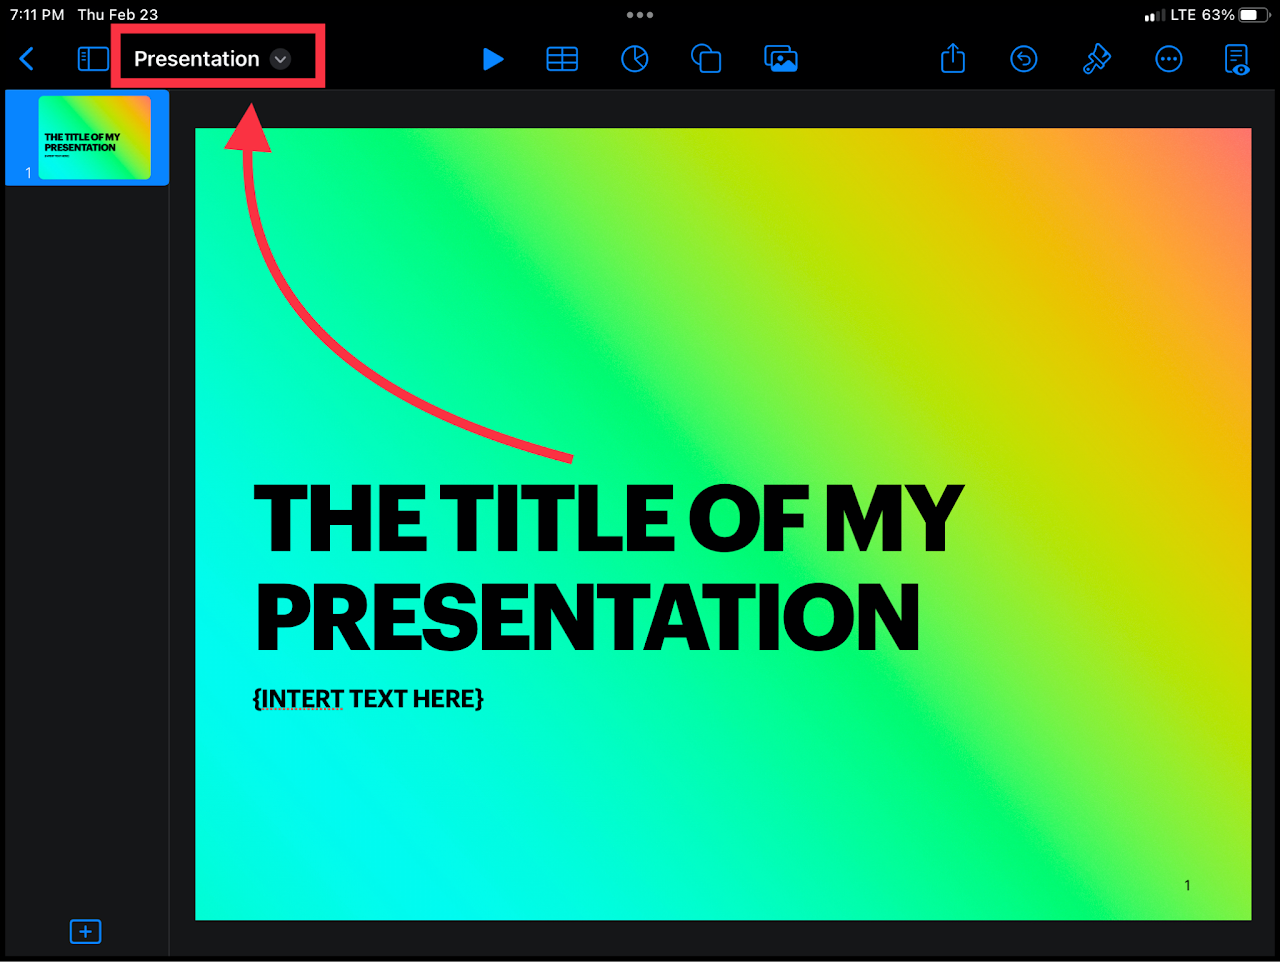
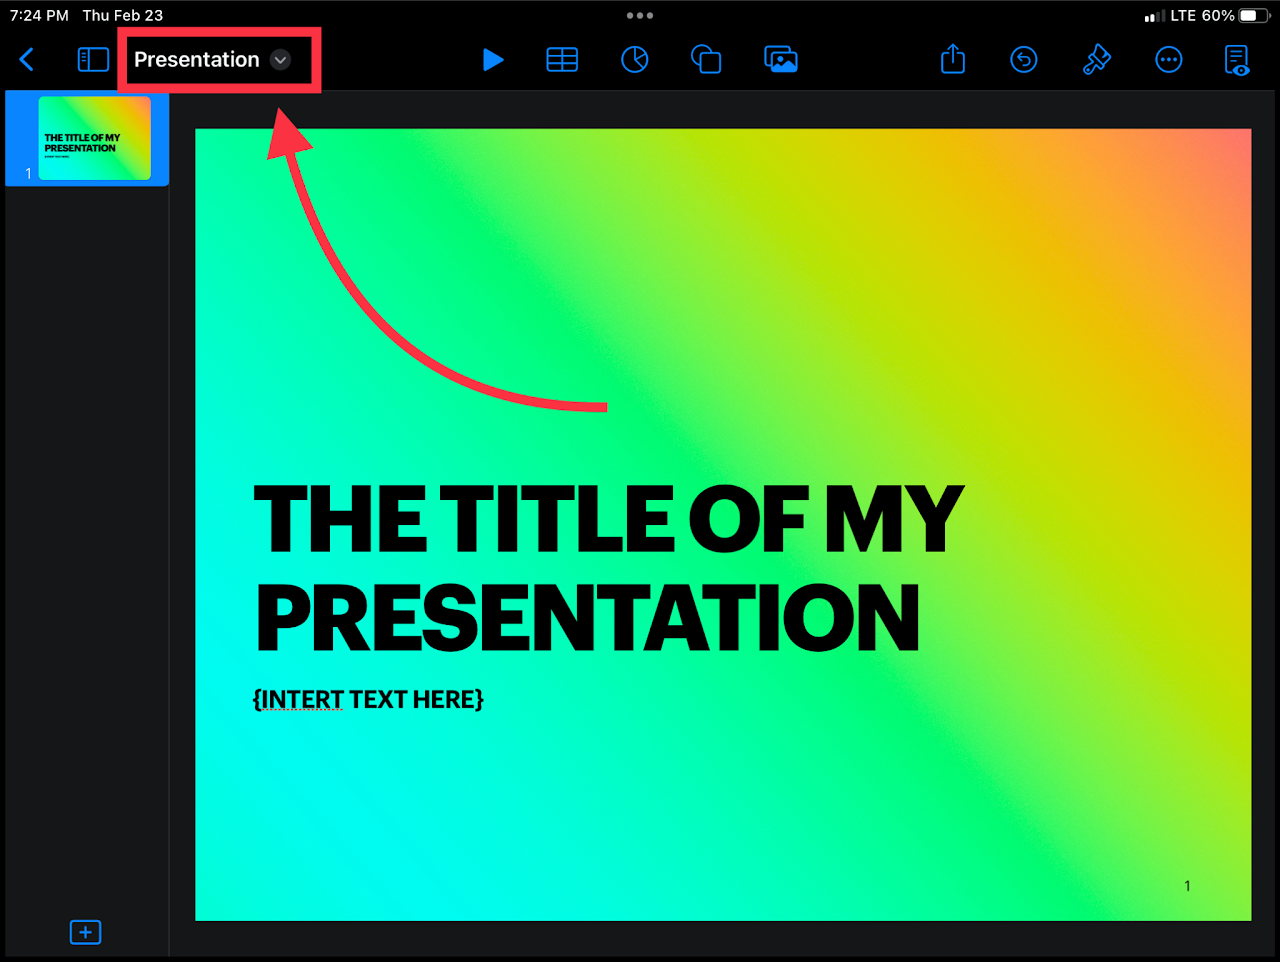
Step 1 - Open The "Presentation Menu"
Select the presentation's title in the top left to open a drop-down menu.
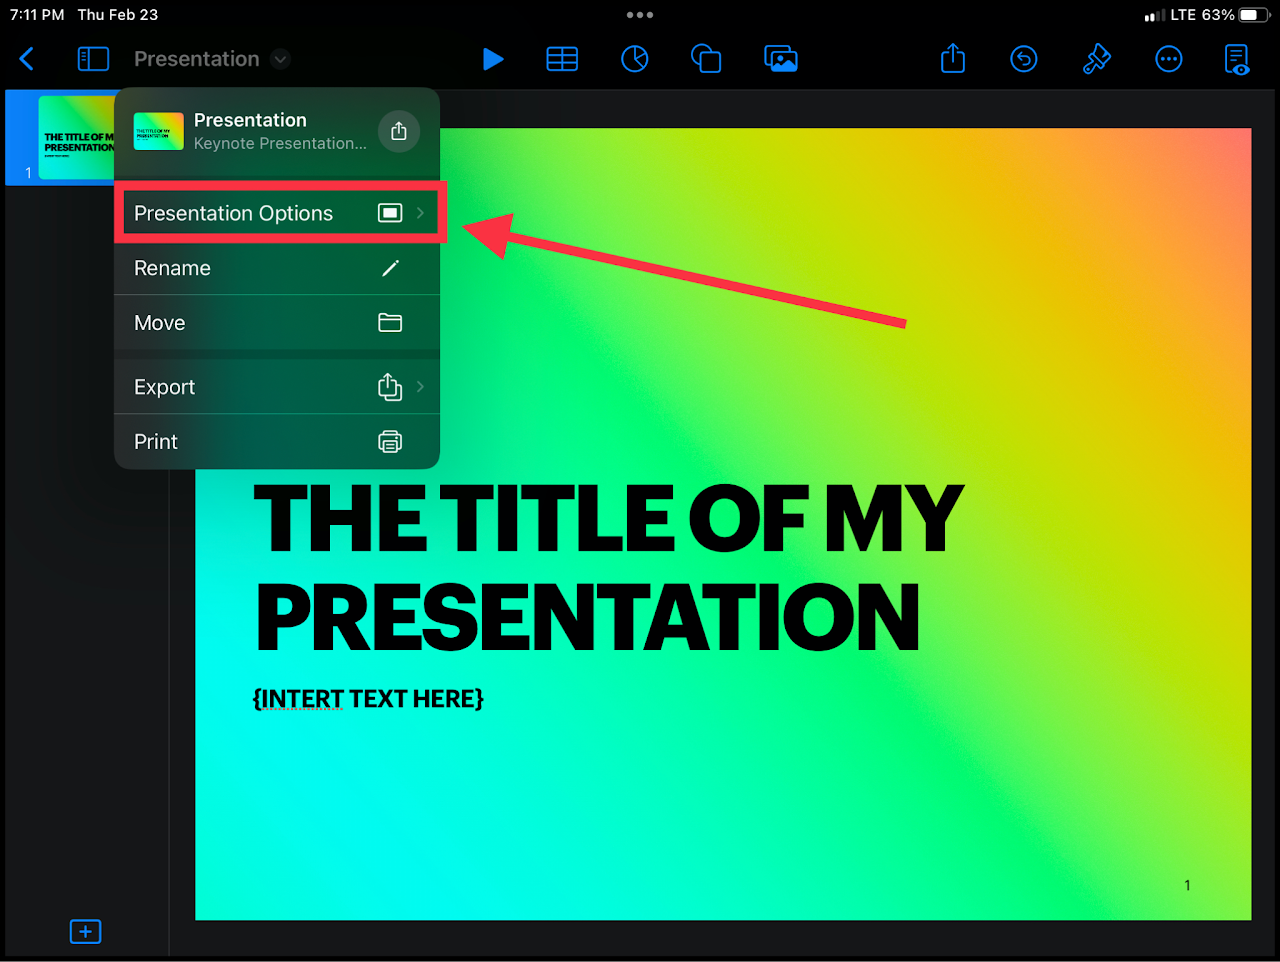
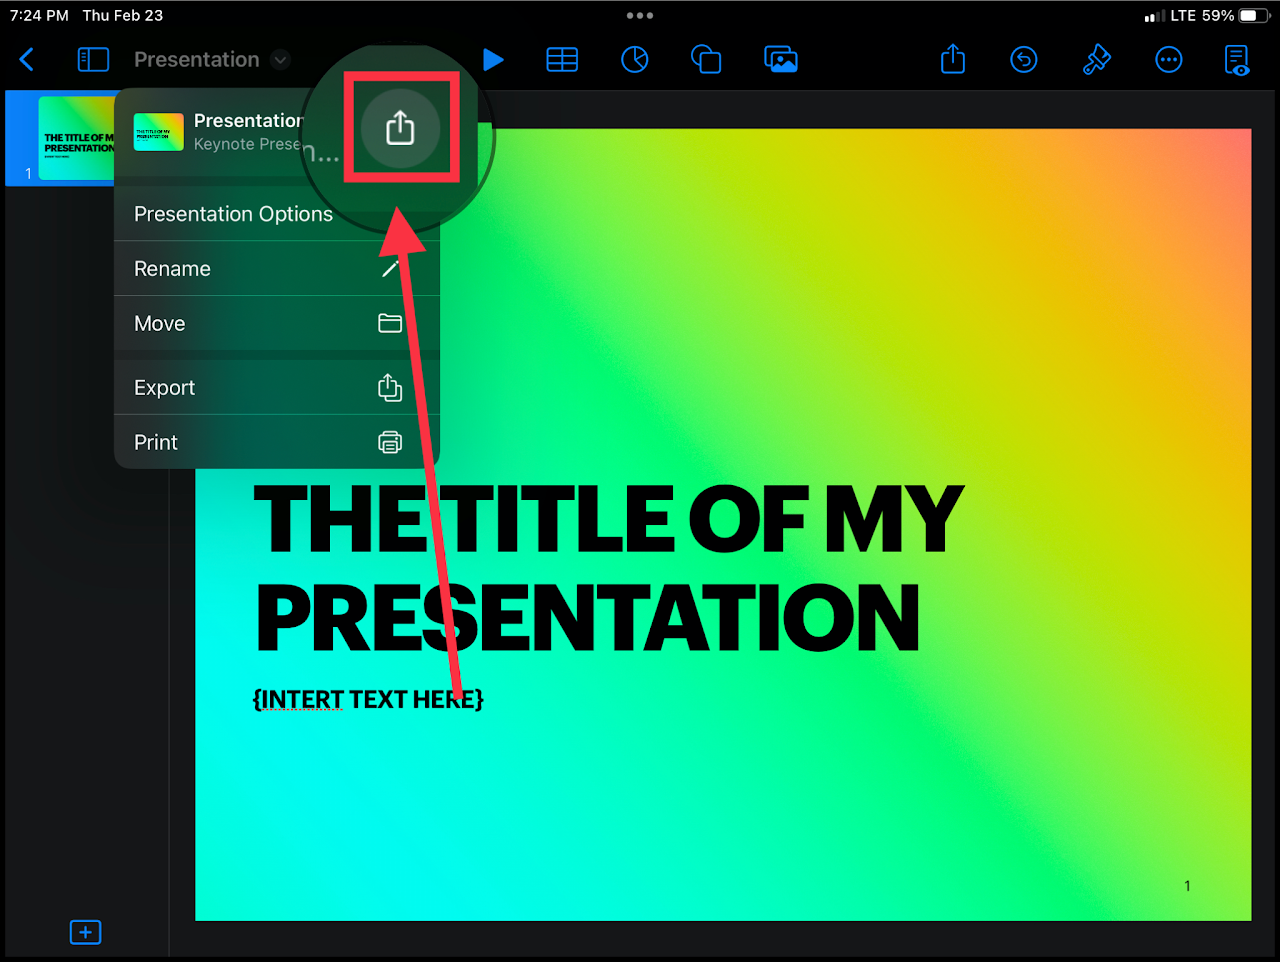
Step 2 - Navigate to "Presentation Options"
Tap the option in the drop-down menu titled: "Presentation Options"
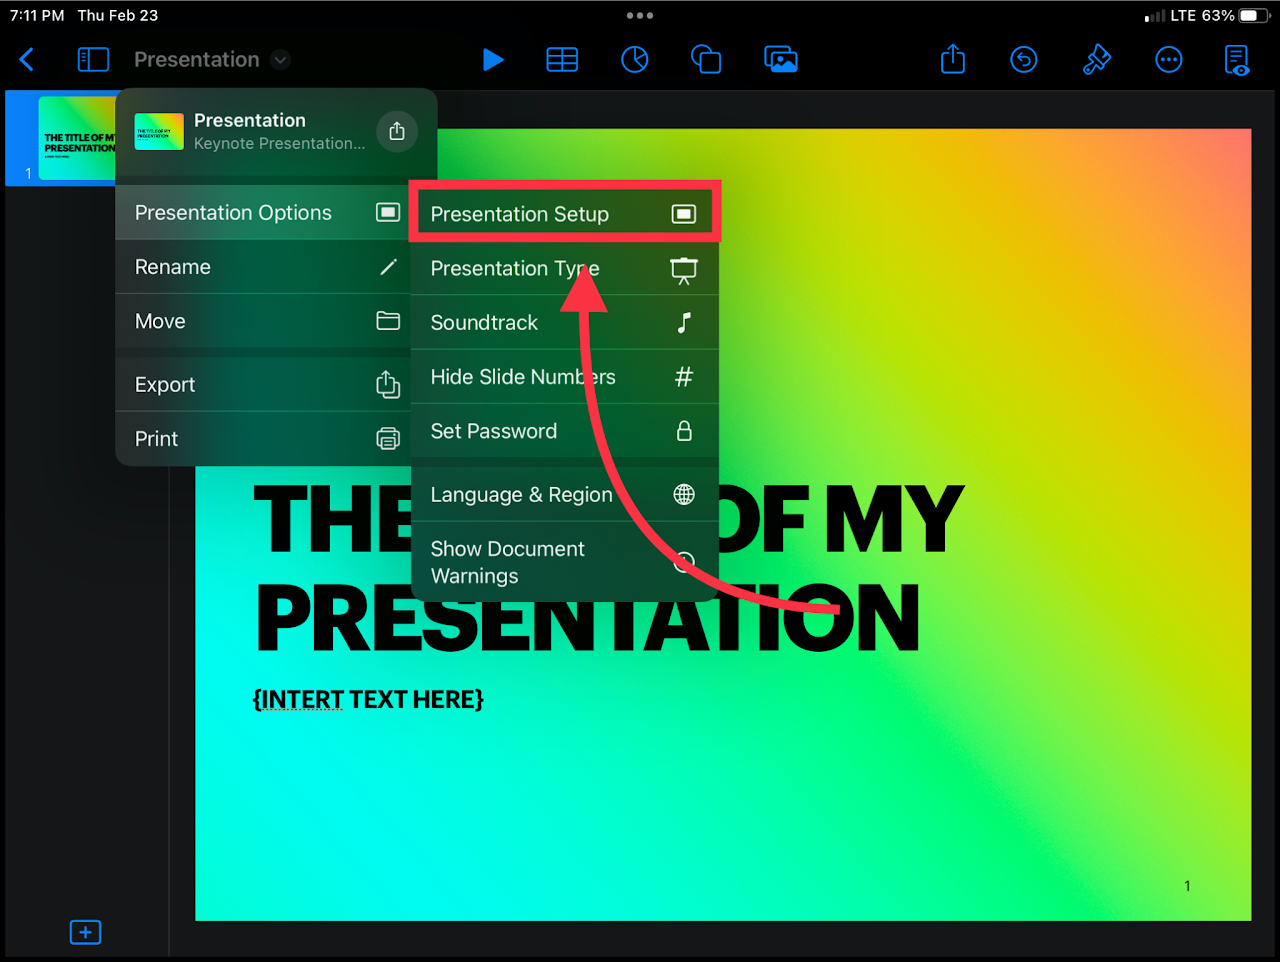
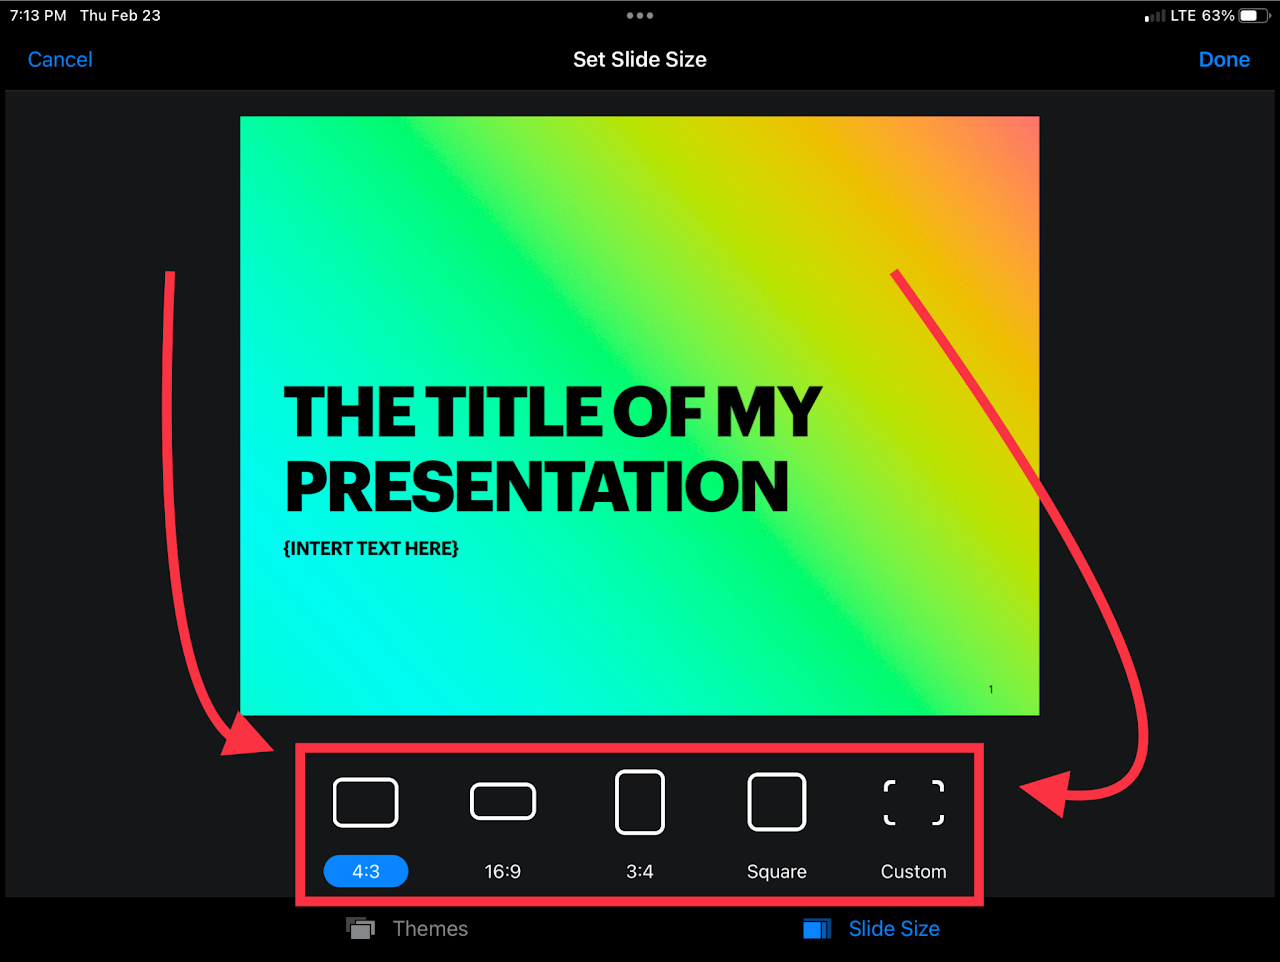
Step 3 - Presentation Setup
Select presentation setup under the "Presentation Options" menu.
Step 4 - Document Slide Options
On the bottom of the screen, select the "Slide Size" option to change the proportions of the presentation.
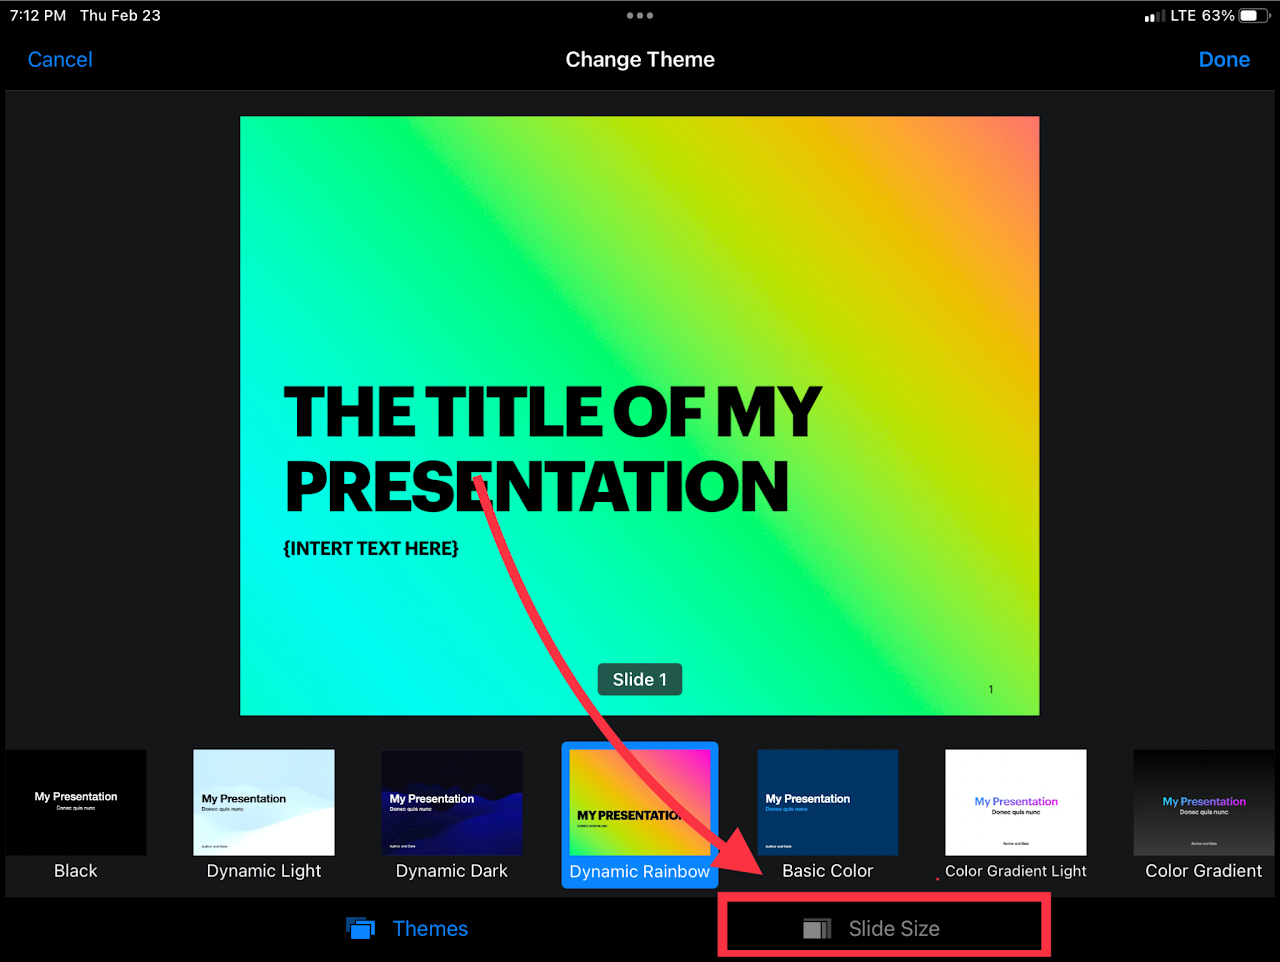
Step 5 - Choose a New Size and Shape
Select the size and shape desired, or create a custom one.
How To Change the Presentation Background in Keynote
Difficulty - Easy
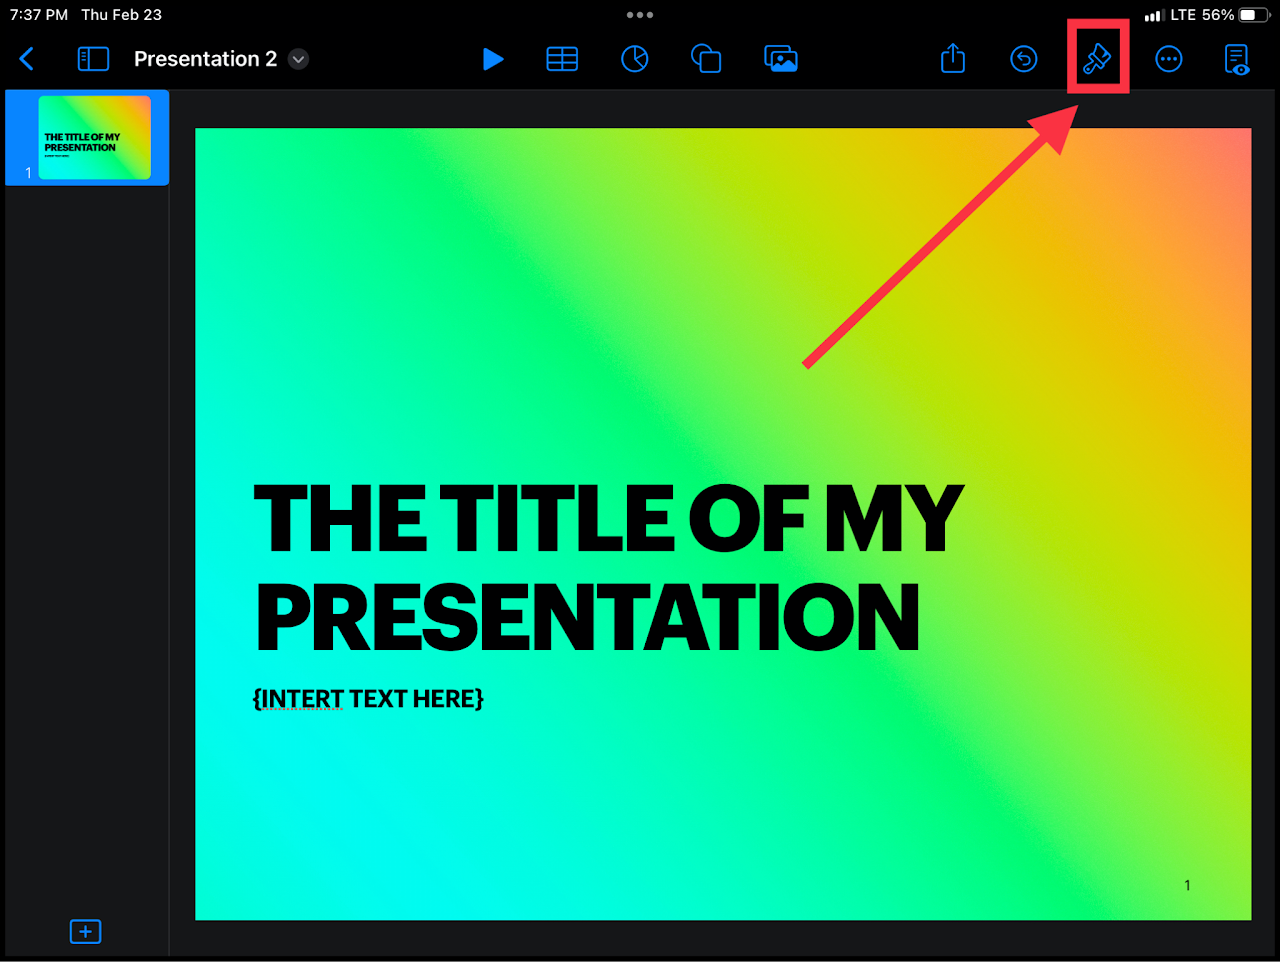
Step 1 - Open the "Document Format" Menu
Select the paint brush in the top right of your screen to change the formatting.
Make sure no other items are selected when opening the menu.
Step 2 - Select "Background Settings"
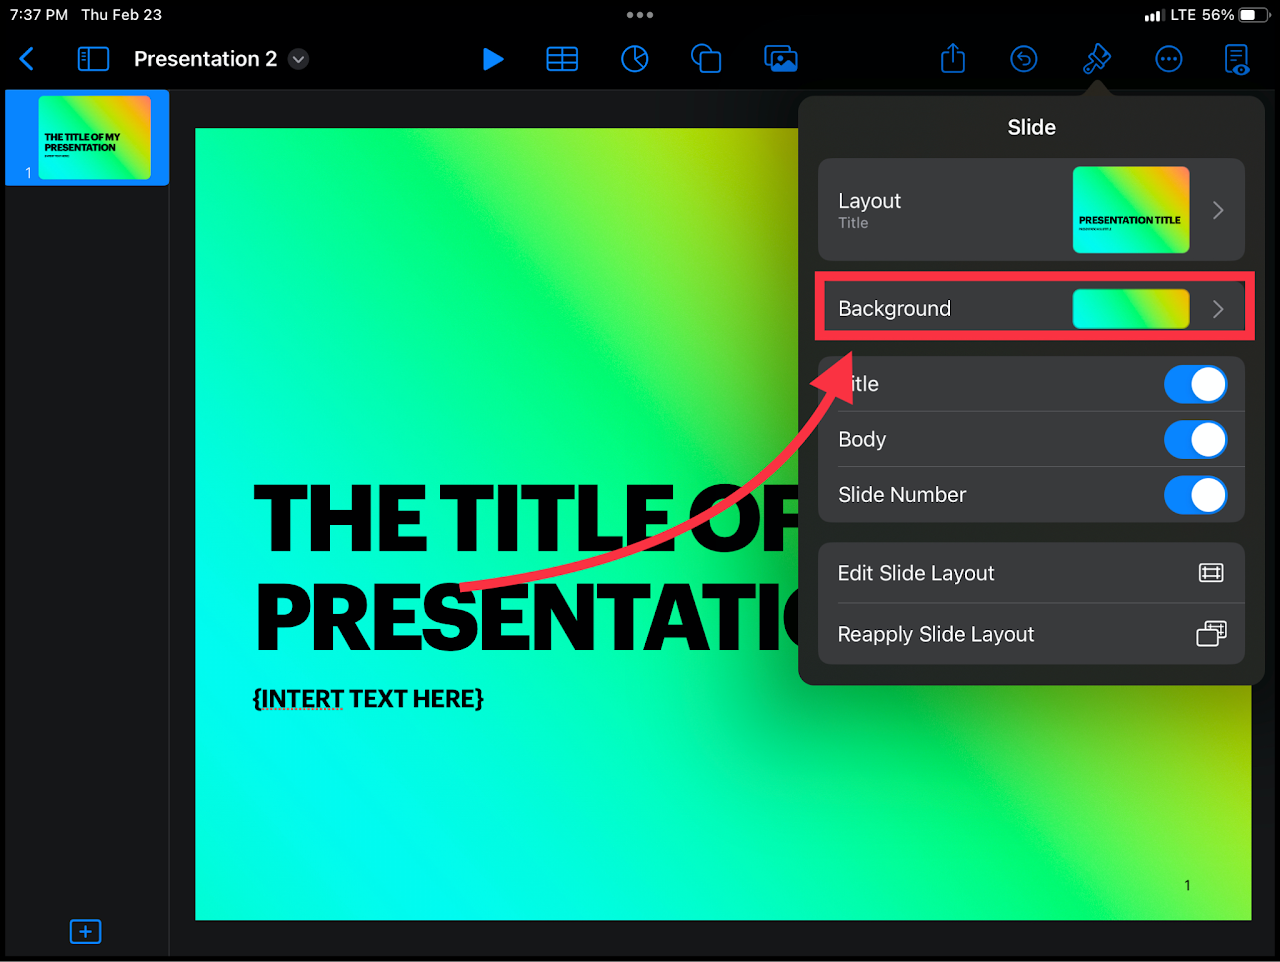
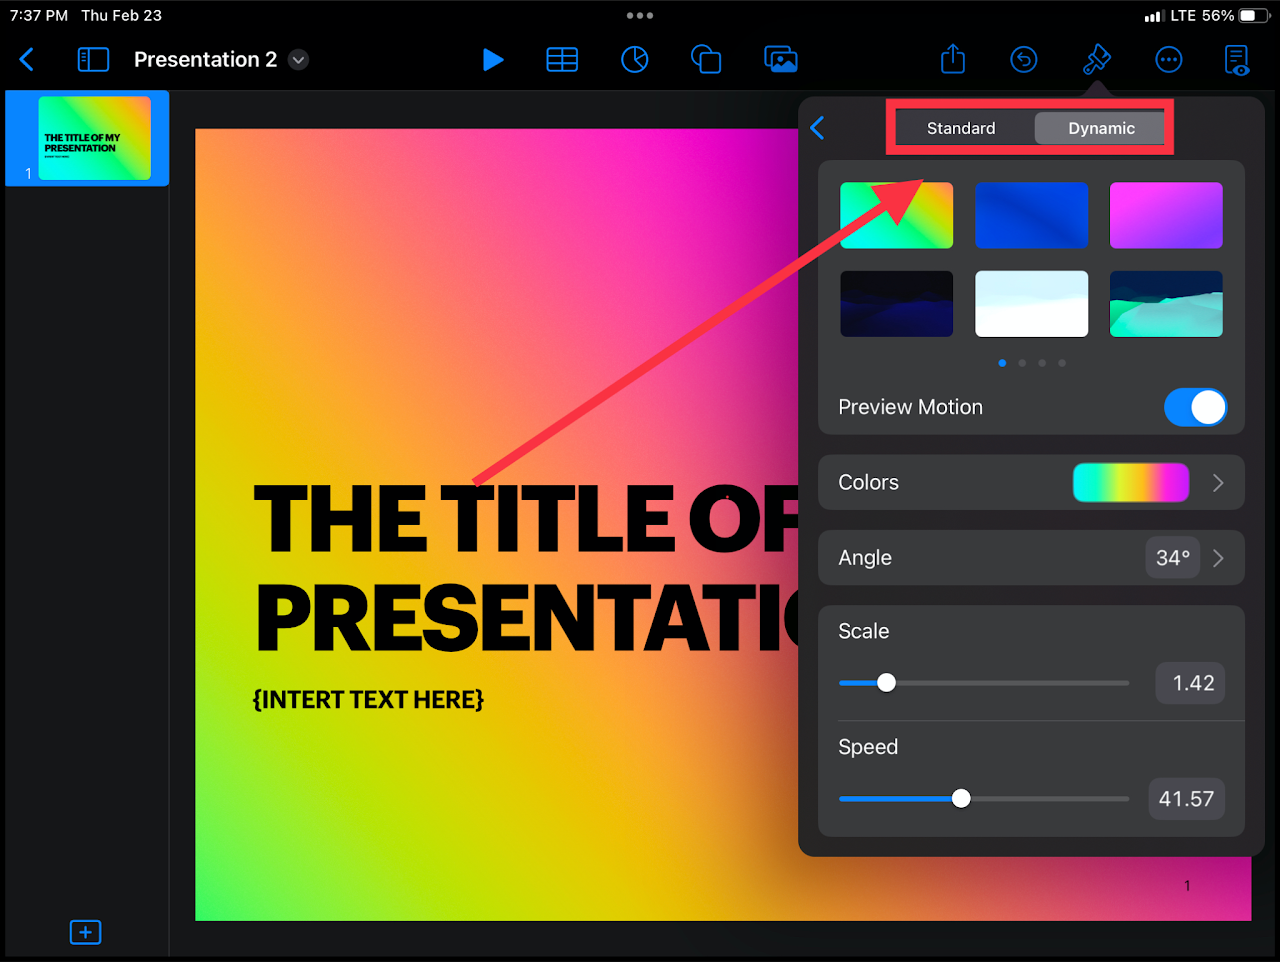
Step 3 - Select a New Background
Select a mode for your background (Standard or Dynamic) and select your desired background.
Dynamic backgrounds change throughout the presentation.
How to Embed Web Videos in Keynote
Difficulty - Easy
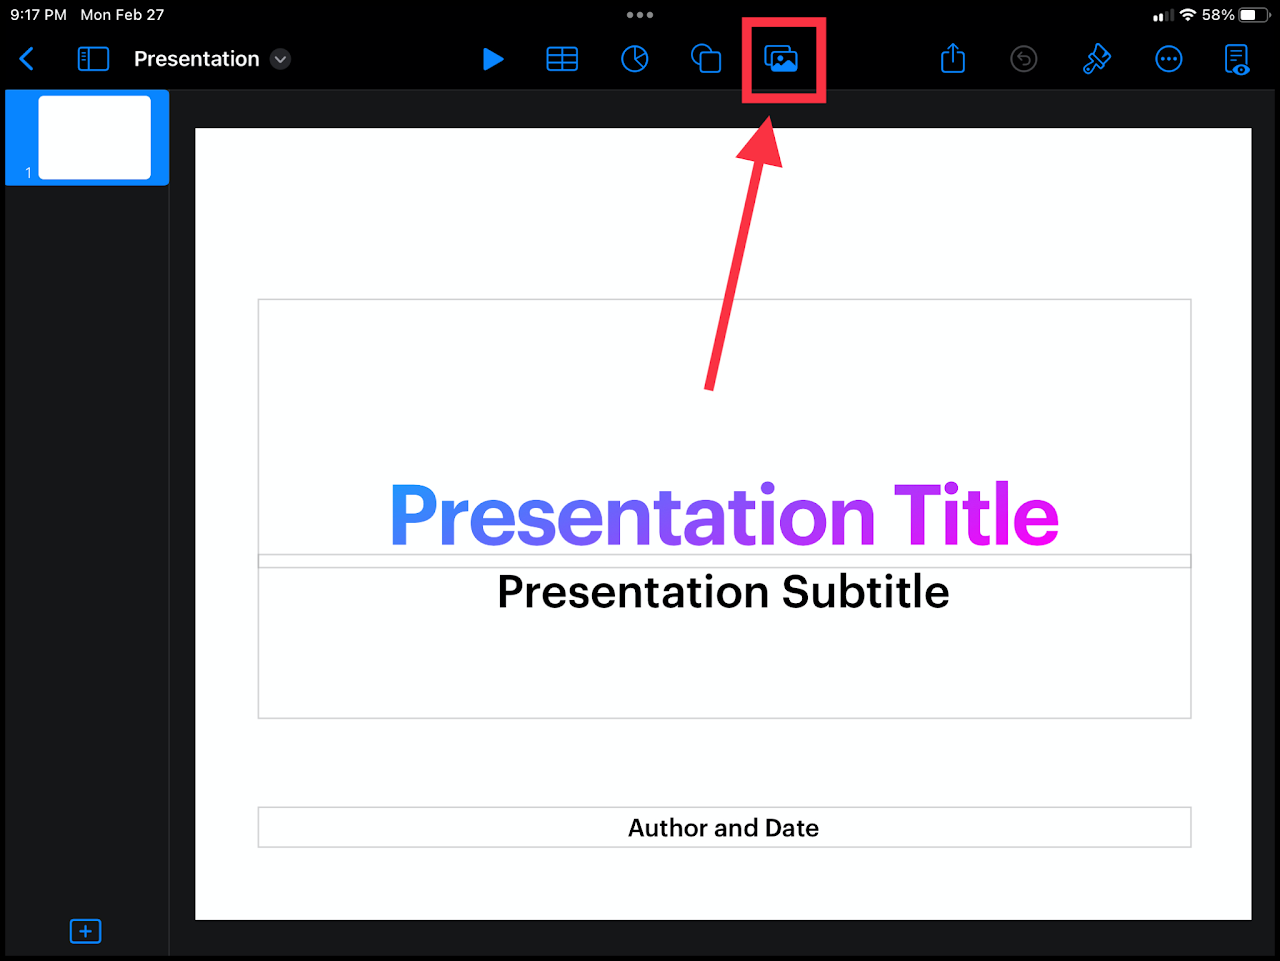
Step 1 - Media Menu
Select the media icon (Stack of Images) in the top of your screen.
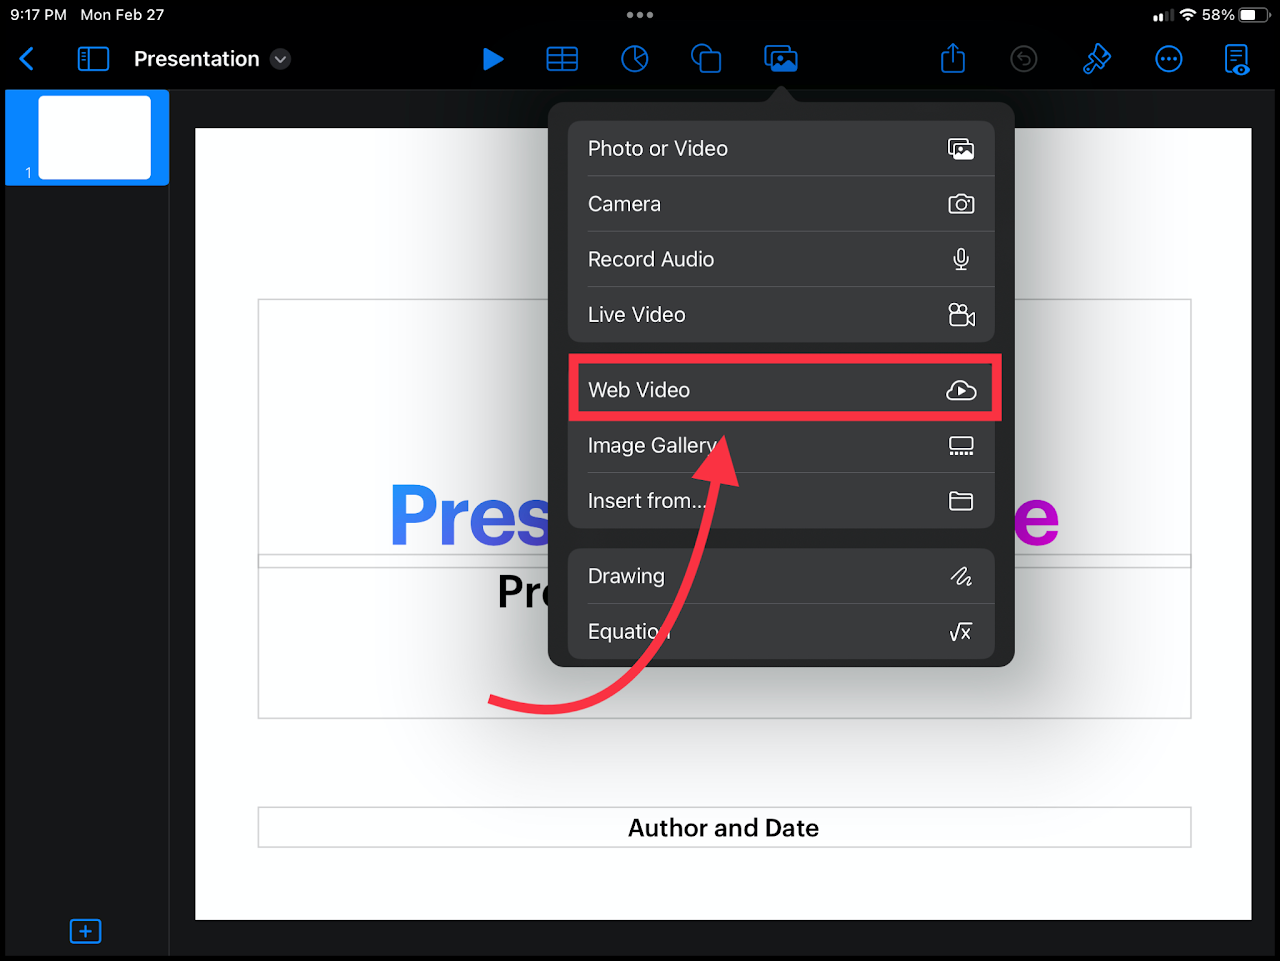
Step 2 - Navigate to "Web Video"
Select "Web Video" in the media menu.
Step 3 - Insert Video
Paste the link of the video into the "Enter URL" field, and select "Insert" in the top right to submit.

Optional - Add Some Flair to the Document
You can add some flair to your document by adding icons, such as a computer icon from the objects menu (located to the left of the media menu). You can also add some speakers or even an antenna.
How To Collaborate on a Presentation in Keynote
Difficulty - Medium
Step 1 - Open "Document Options"
Select the title of your document in the top left of the screen to edit your document options.
If your document is not saved in iCloud, do so now. Or else, the remaining steps will not apply.
The document does not have to be complete before collaborating. All edits are synchronized with the collaborators.
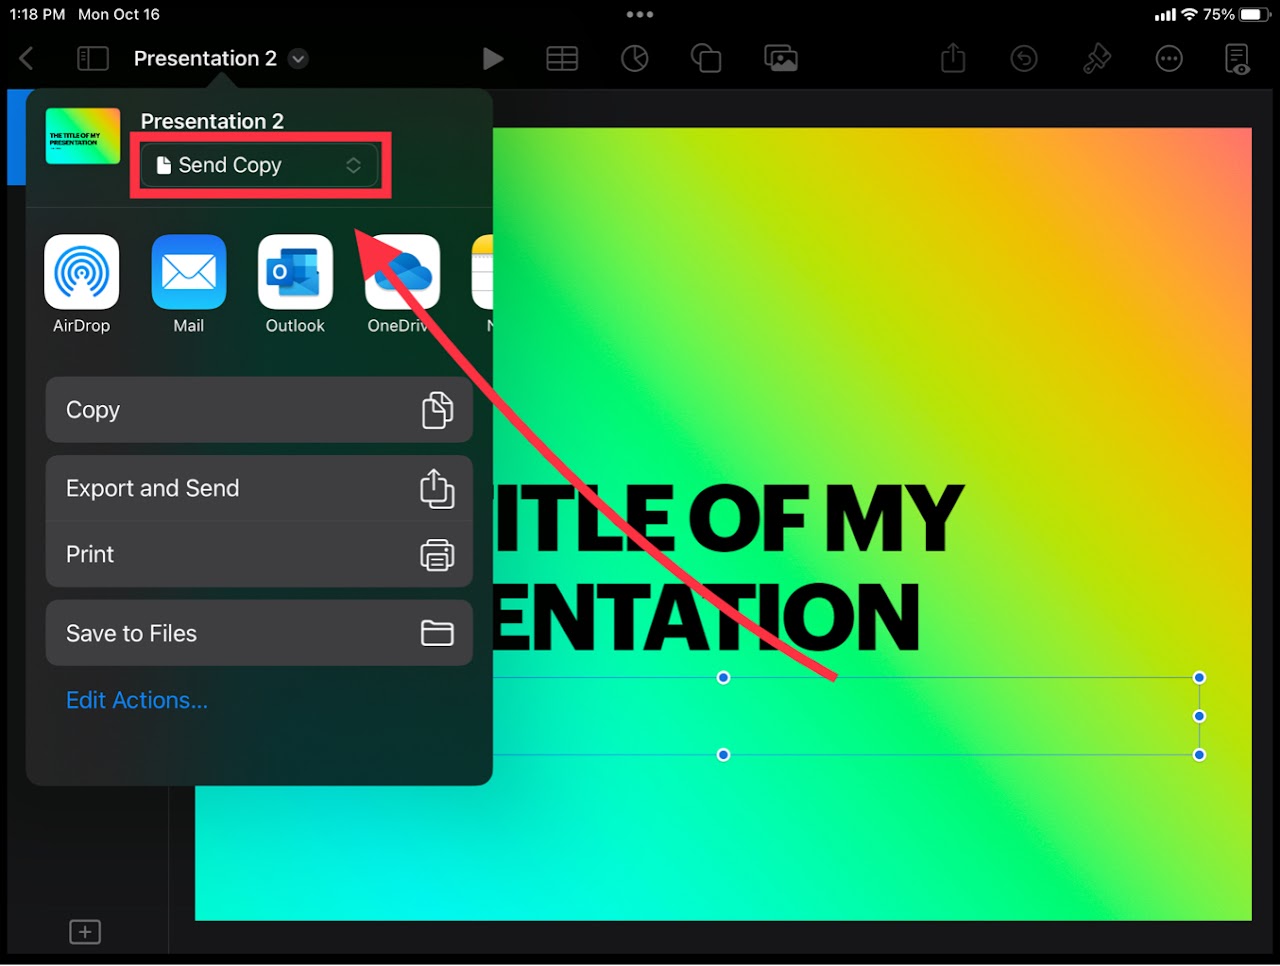
Step 2 - Open "Document Sharing Options"
Step 3 - Configure Collaboration
Select the "Send Copy" option and switch it to "Collaborate". This will create a live file or link to share with others.
Step 4 - Choose a Sharing Method
This is the way your new live file/ link will get shared with the collaborators. Select what you feel comfortable with.
We recommend using "Invite with Link". Feel free to experiment with other options.

Step 5 - Add Collaborators
Next, you'll add authorized users to your link. This ensures that people without access cannot edit your file.
Teacher Emails: "teachernameorid@dadeschools.net"
Student Emails: "studentid@students.dadeschools.net"
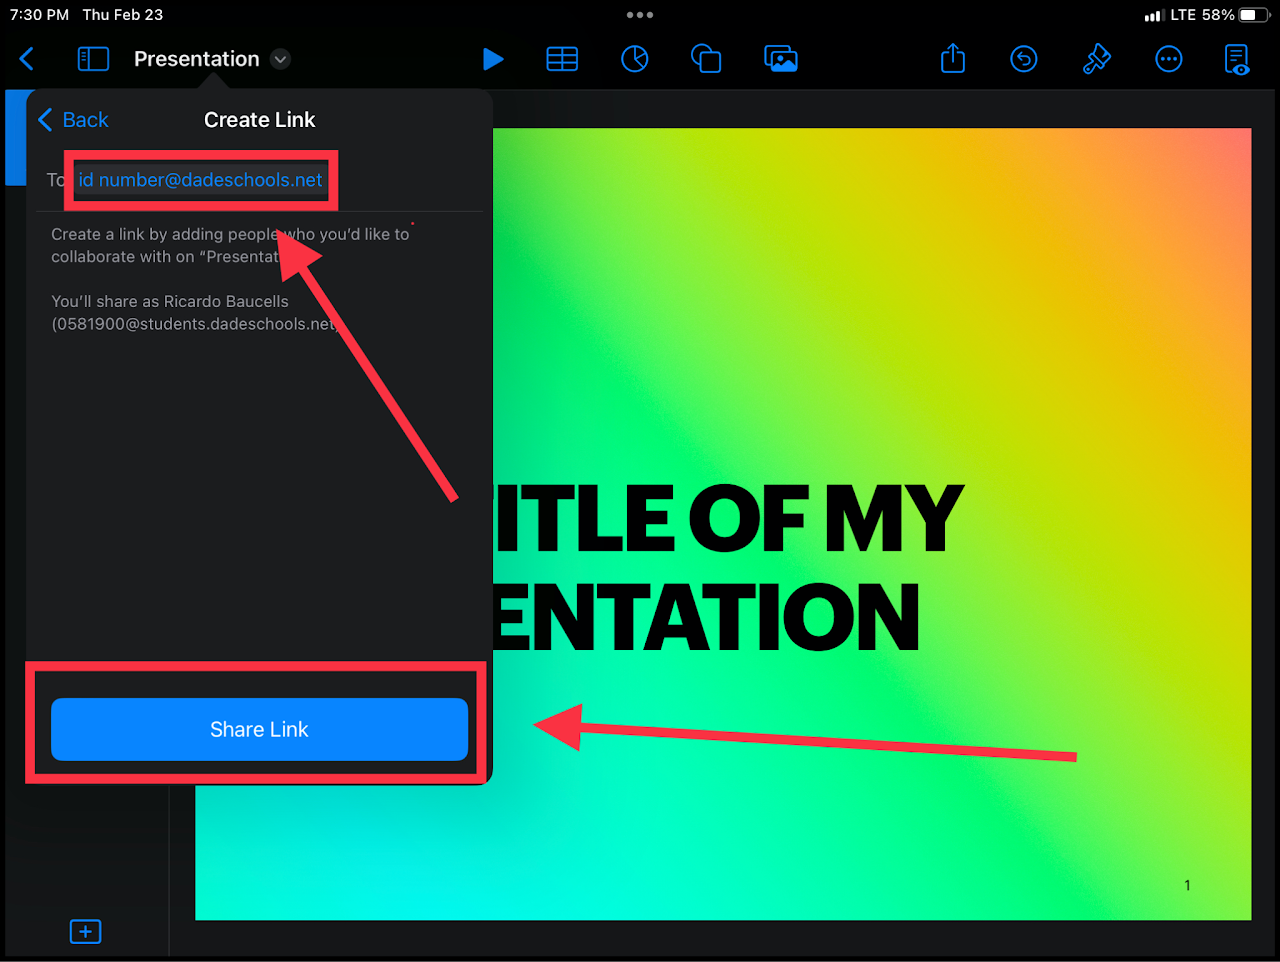
Some teachers may have different emails than what would be assumed. Check on your MDCPS portal to confirm their E-Mail address.
After pressing "Share Link", select a sharing method such as Outlook (Recommended) to send the link to an email address.
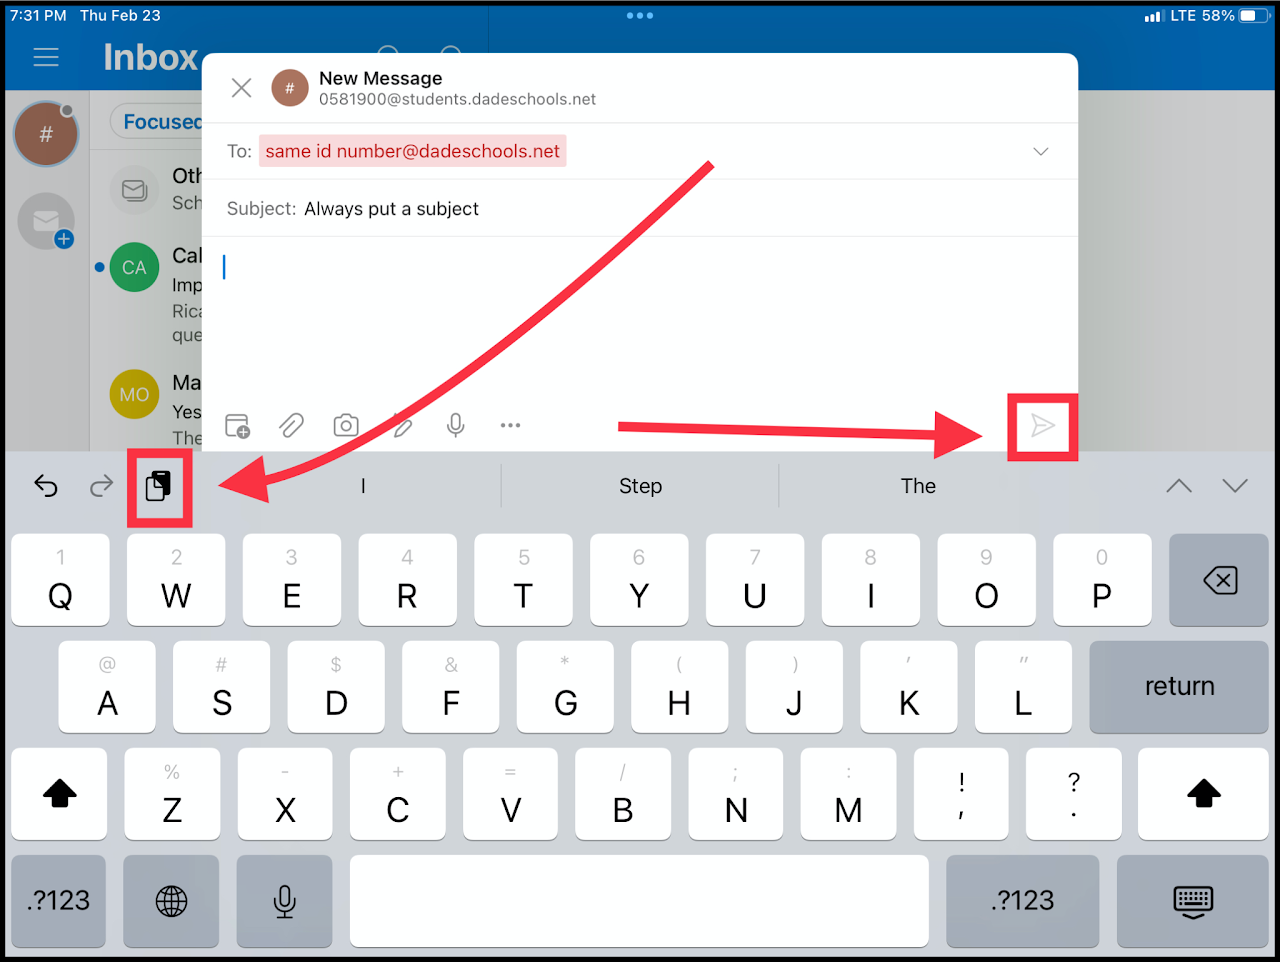
Step 6 - Send Your Link
Open outlook and write an email to your teacher that includes the link.
The E-Mail will not send if there is no subject for the message.
You can copy and paste the link into the body of the E-Mail.
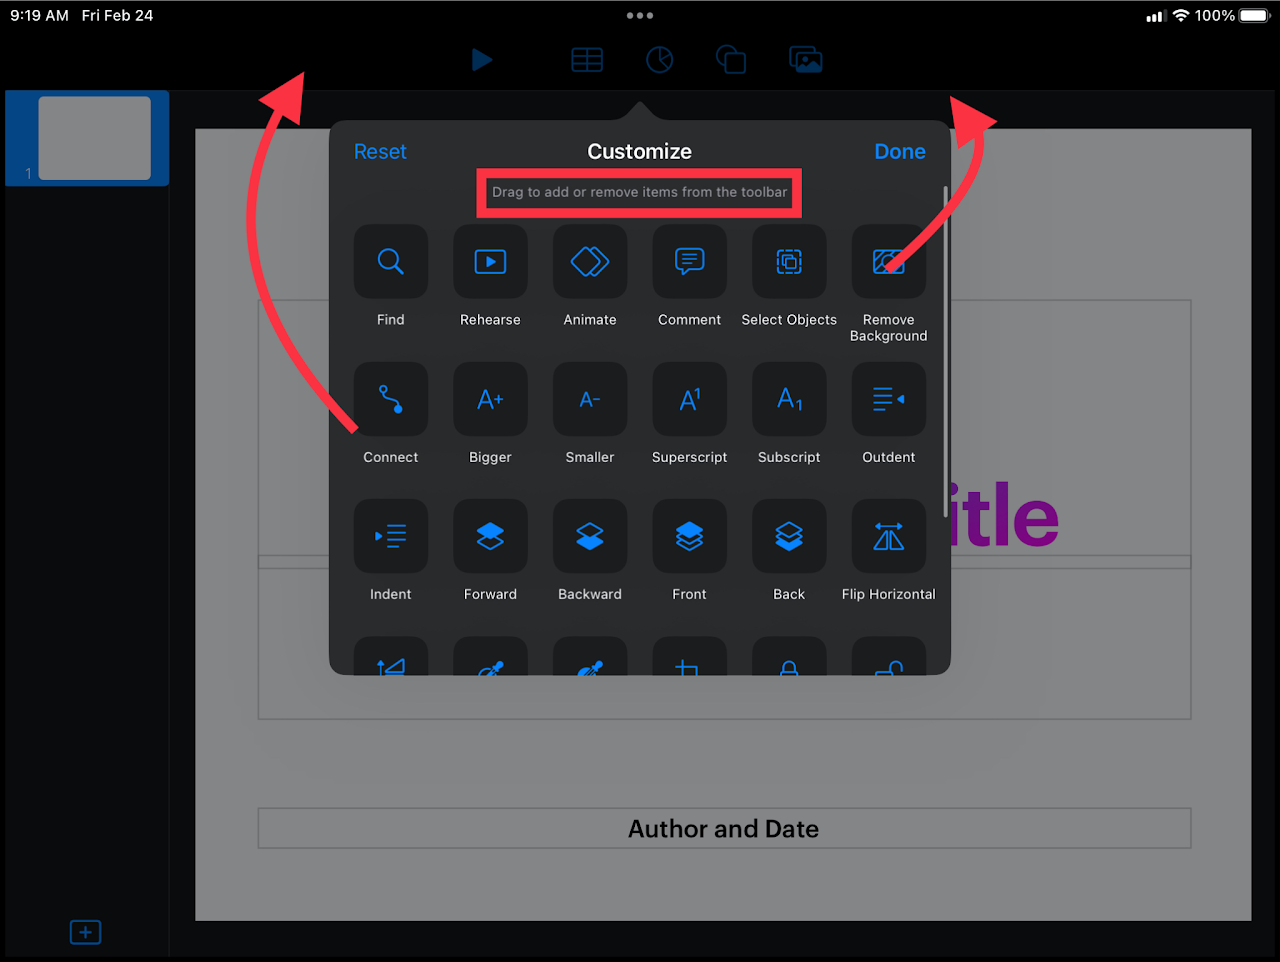
How To Customize the Toolbar in Keynote
Difficulty - Medium
Step 1 - Navigate To The Extras Menu
In the top right of the screen, select the 3 dots.
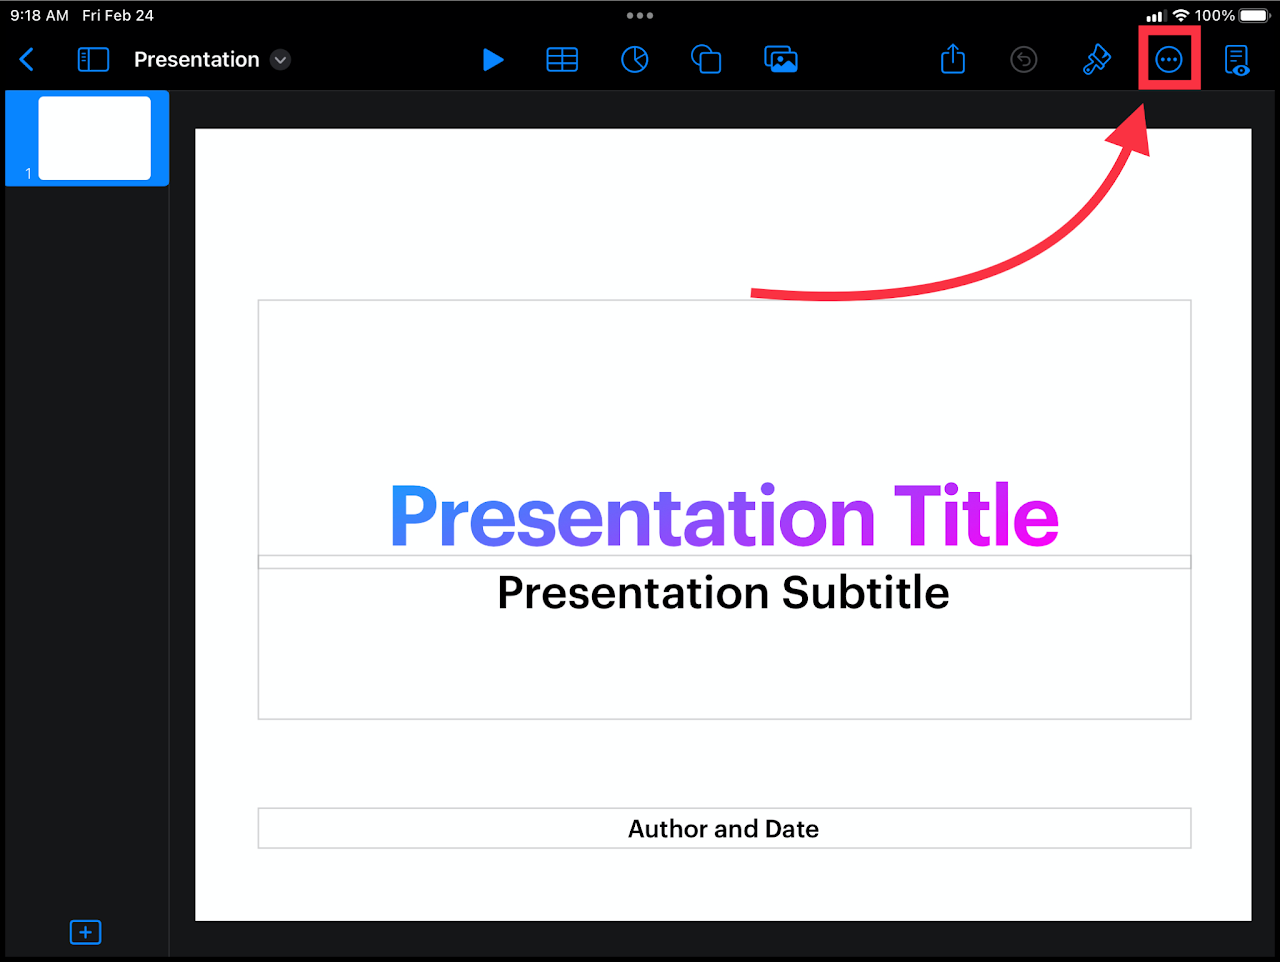
Step 2 - Select "Customize Toolbar"
After opening the extras menu, select the "Customize Toolbar" option.

Step 3 - Start Customizing
You can drag and drop the different icons shown on your screen to the top toolbar. You can remove items by doing the opposite.