OctoPrint
Ender 3 V2 Mriscoc FW
OctoPrint allows easy and quick remote access for 3D printers. It's easy to use, and setting it up is a breeze.
-------------------------------------
This guide is specifically focused on the Ender 3 V2 w/ Mriscoc Professional Firmware Installed. Any other printer could be damaged.
The imaging section can be used for other devices, but any code or plugins may be different depending on the model.
1. Overview and OS Image
This process can get a little intense, as you may need to use the command line, or input code in OctoPrint. If you're familiar with SBCs (Single Board Computers) and 3D Printing, this will be simple.
What is a Raspberry Pi?
A Raspberry Pi is a SBC (Single Board Computer) with a small processor and low power consumption. These can be used for an extremely wide variety of tasks. From turning light on and off, to creating websites. These can do it all. This tutorial uses them for OctoPrint.
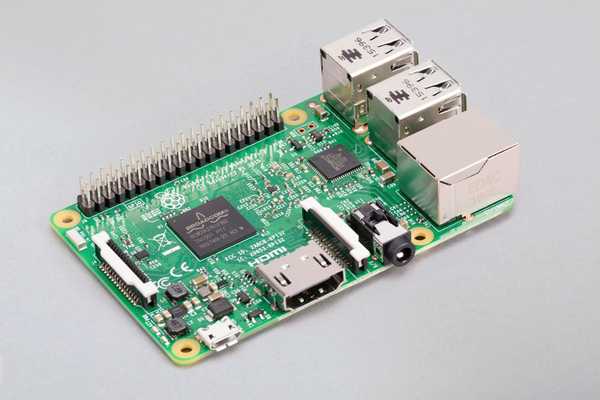
Image of a Pi 3B+
What is OctoPrint?
OctoPrint is a piece of software that runs on a computer connected to a 3D printer. Usually, this device is a 'dumb' 3D printer like an Ender 3 (or in our case, an Ender 3 V2). This software allows remote control of almost all functions in the device, except for manual adjustments or leveling.
It is recommended to only run one printer per-Pi. While it is possible to run more, it is not supported by OctoPrint's developers, and is not usable on a Raspberry Pi 3B+.
Why do this?
OctoPrint can be helpful for many things. The most important of which is remote management. It allows you to ditch the SD card, and print over the network with a simple (and beautiful) UI. It also can help in printer troubleshooting, filament cost estimations, and more.
Requirements
- Laptop (Preferably windows)
- Raspberry Pi 3B+ (During the release of this document, the Raspberry Pi 5 has just been released.. As of writing this, the STEM club does not own any Pi 4s, 5s, or 0s. This documentation is strictly based on this model.).
- USB Cable (A to whatever the printer has).
- Micro-SD Card ⪰ 8GB.
- Basic networking and extensive 3D printing knowledge.
- Travel router, standard router, or a mobile hotspot with Ethernet (Mrs. Menocal's "AirCard")
Optional Hardware
- Pi Camera or Webcam
- Raspberry Pi Case (Heat-sink strongly recommended
This guide is made for use with a Windows PC, but should be suitable for other Operating Systems as well,
Part 0: Basic Hardware Info
The printer this tutorial is specifically made for is the Ender 3 V2. The PWB STEM Club has 3 E3V2s, and if devices need to be reset or new printers are getting set-up, this tutorial can be used.
Part 1: PC Software
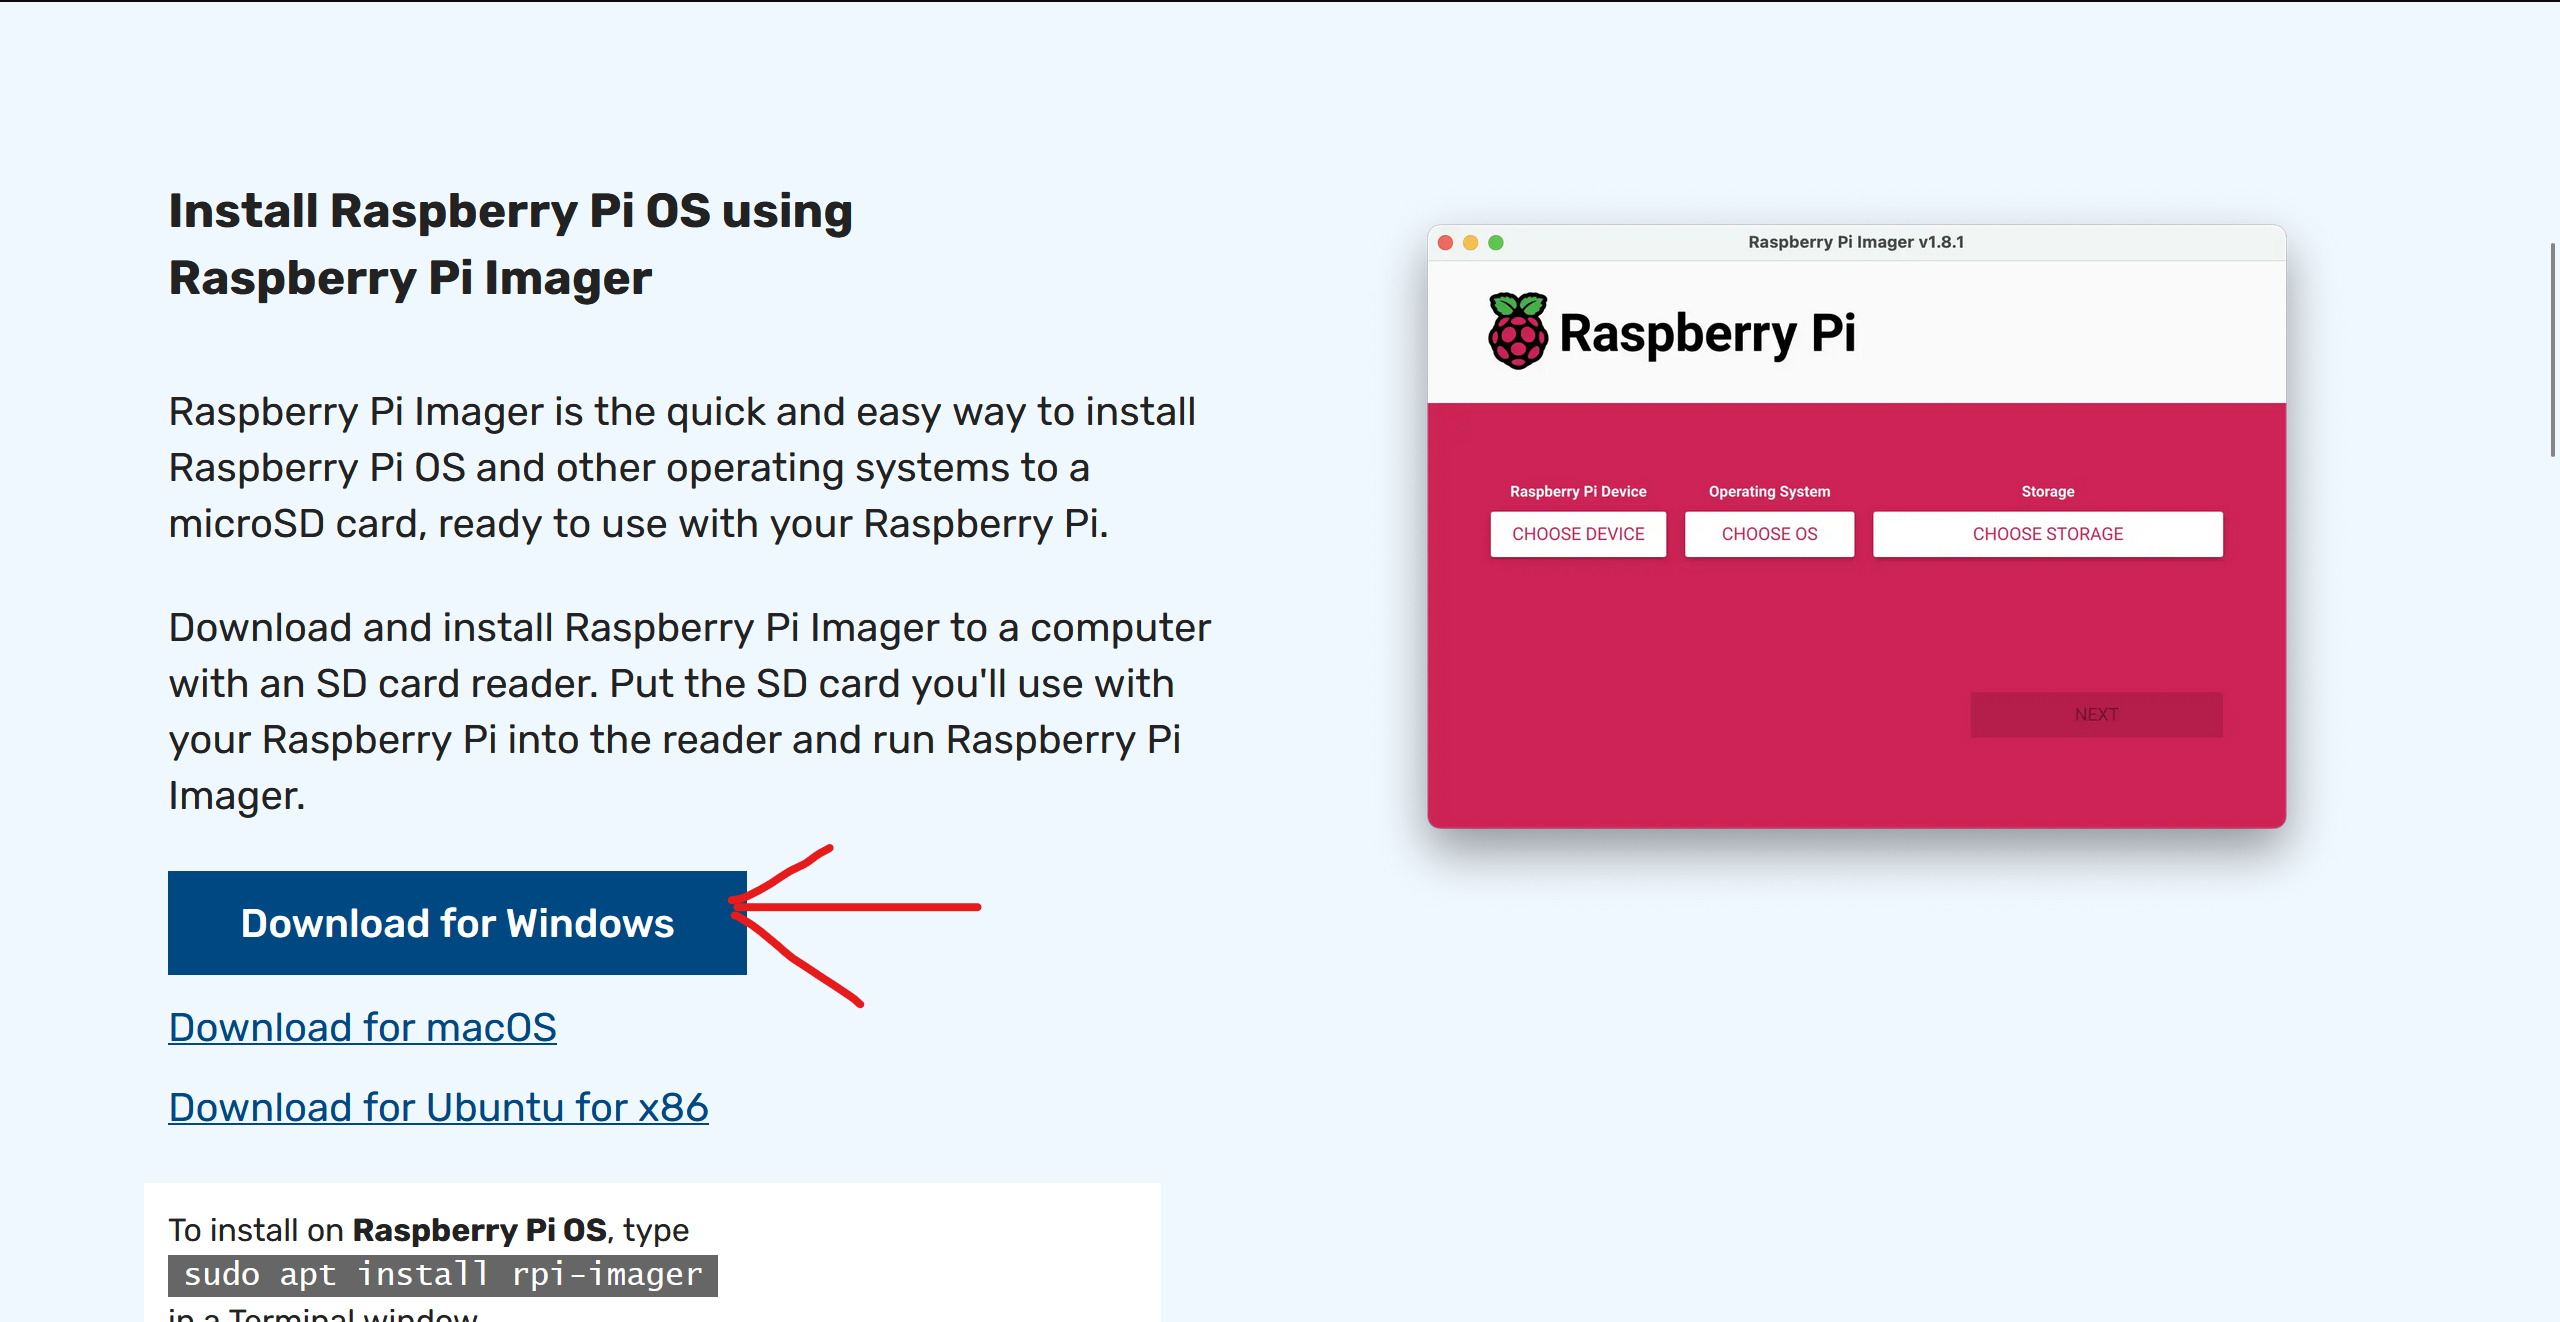
1. On your computer, install the Raspberry Pi Imager
Select download for windows (on a windows PC), or whatever suits your OS.
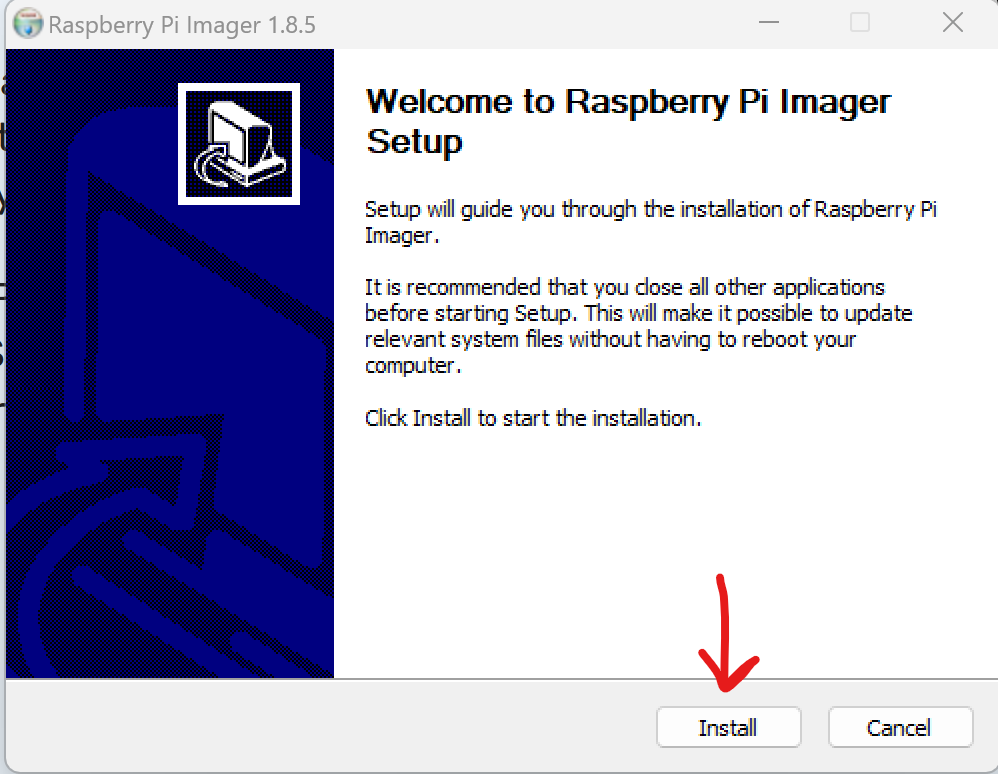
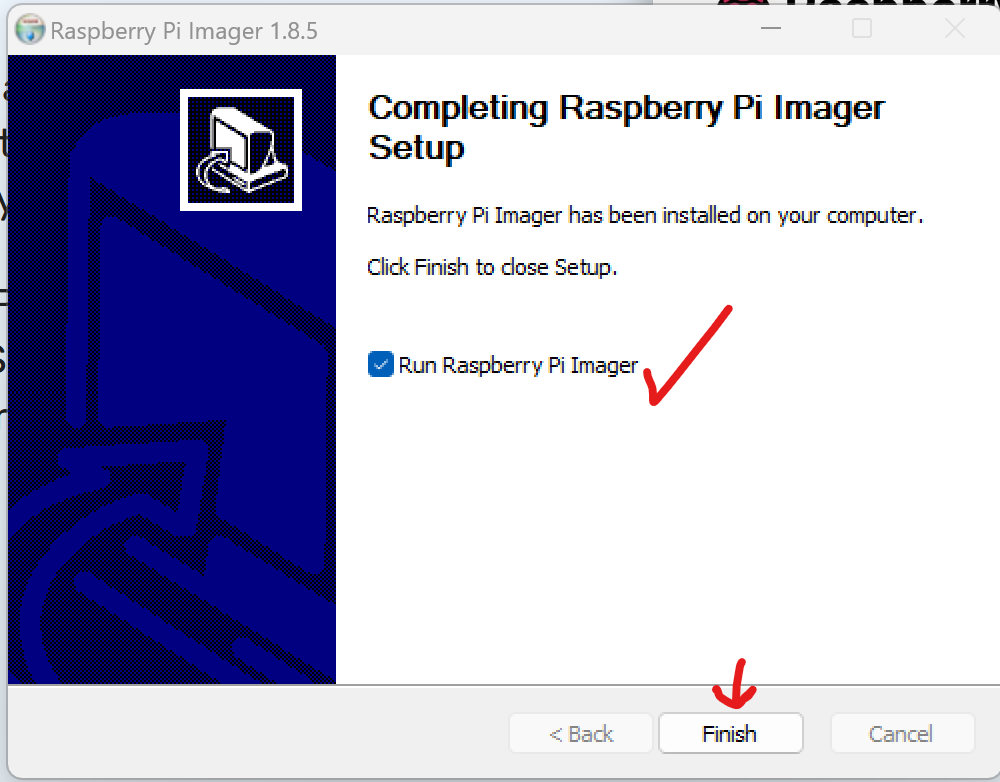
2. Go through the installer, leaving all defaults.
"Run Raspberry Pi Imager" should stay enabled.
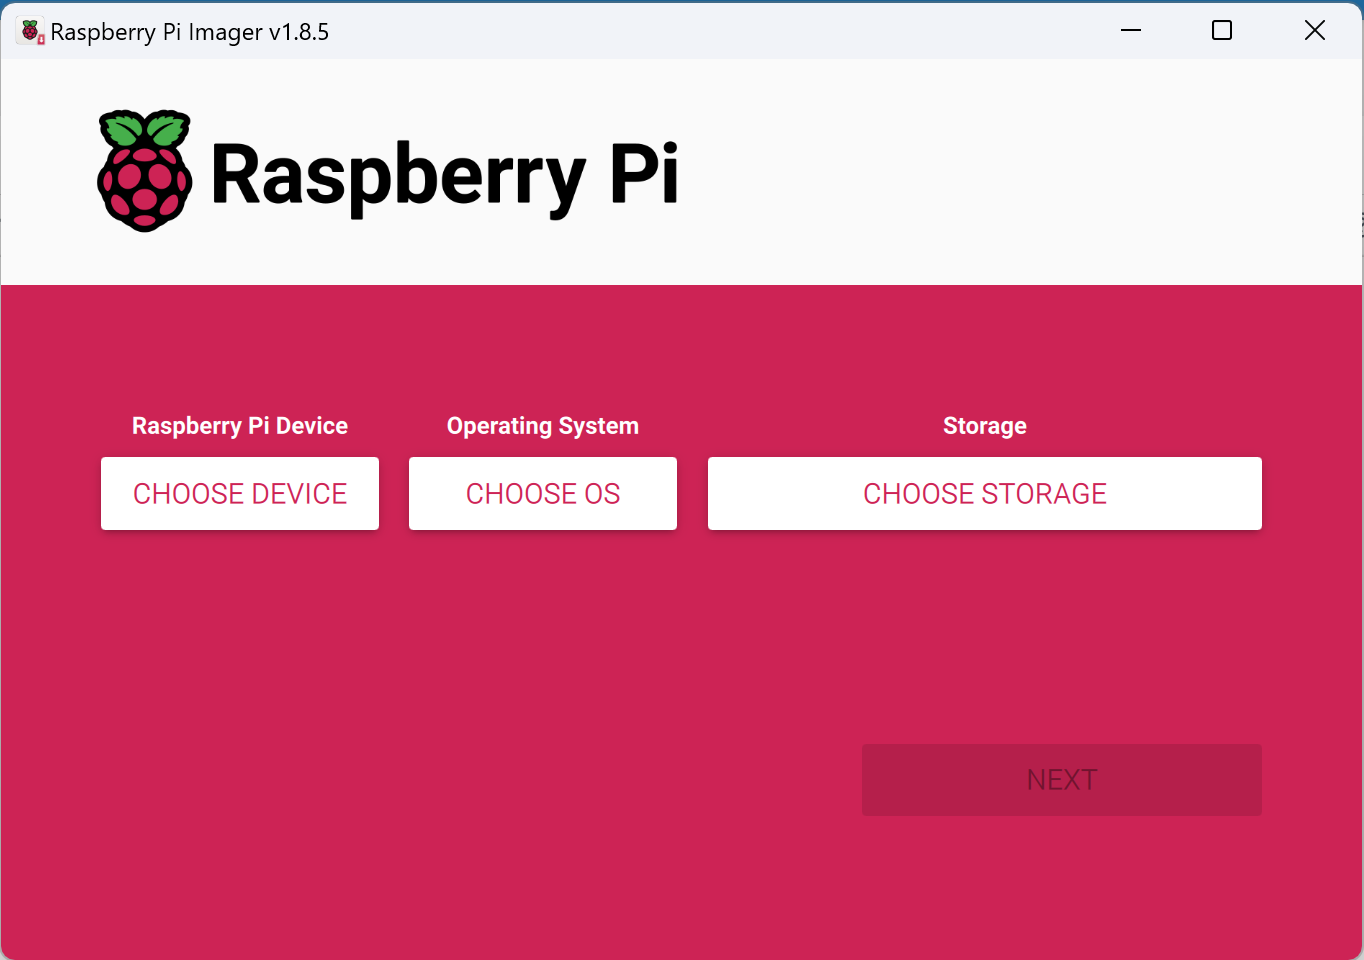
Once you see this screen, you're all set!
Part 2: Select the Image
Using an SD Card (8Gb or greater) and the Raspberry Pi Imager, you can setup the SD Card for easy installation of OctoPrint.
At this point, insert the SD Card in the computer with the Raspberry Pi Imager installed.
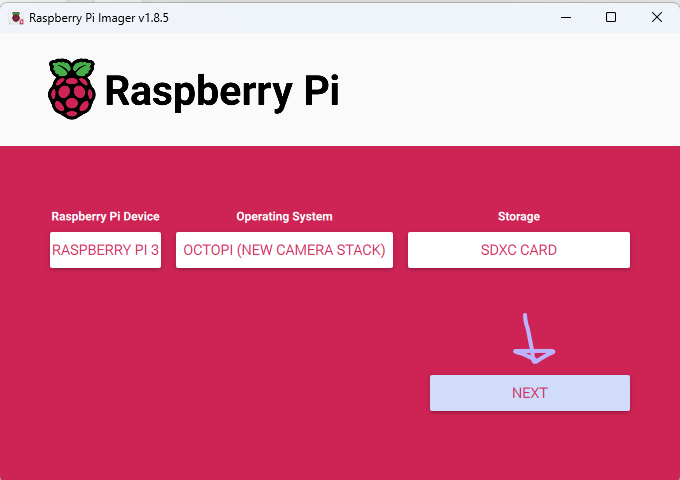
1. In Raspberry Pi Imager, select "Choose Device". This is where you will select the Raspberry Pi model that the software will be installed on. In this case, we'll use a Raspberry Pi 3.

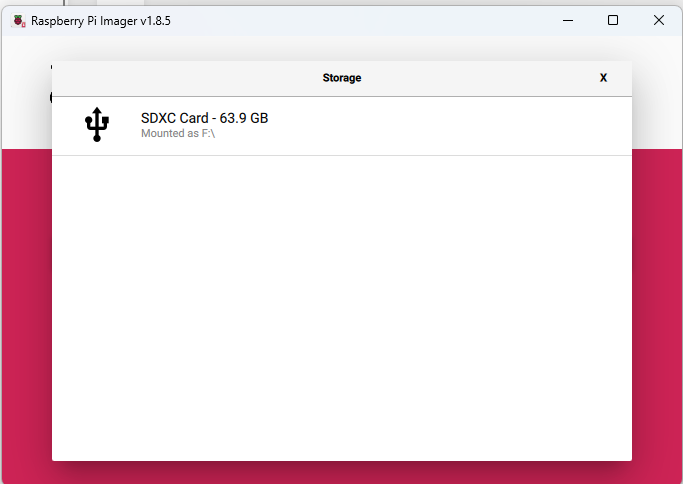
2. Next, select "Choose OS", "Other Specific-Purpose OS", "3D Printing", "OctoPi", and finally, "OctoPi (New Camera Stack) 3. Lastly, select "Choose Storage", and then select the SD card.
4. To complete the basic configuration, select "Next".
Part 3: The Nitty-Gritty
You will not be using Wi-Fi for the tutorial. The Pi will be directly connected to the Dadeschools Ethernet ports with "-M", "-L1", "-L2", or "-L3" appended to the end.
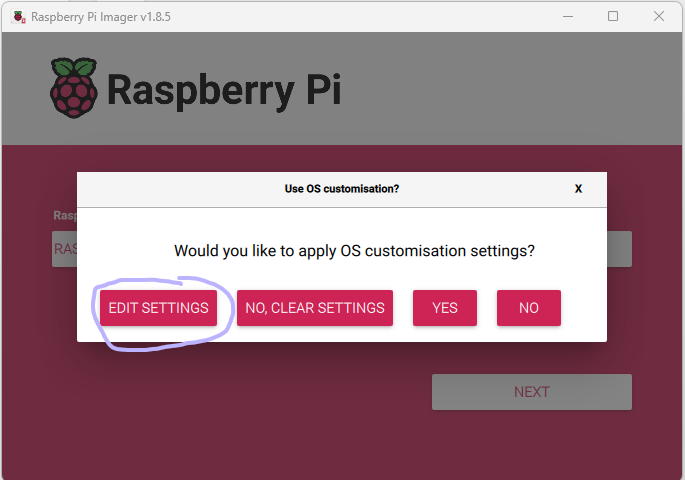
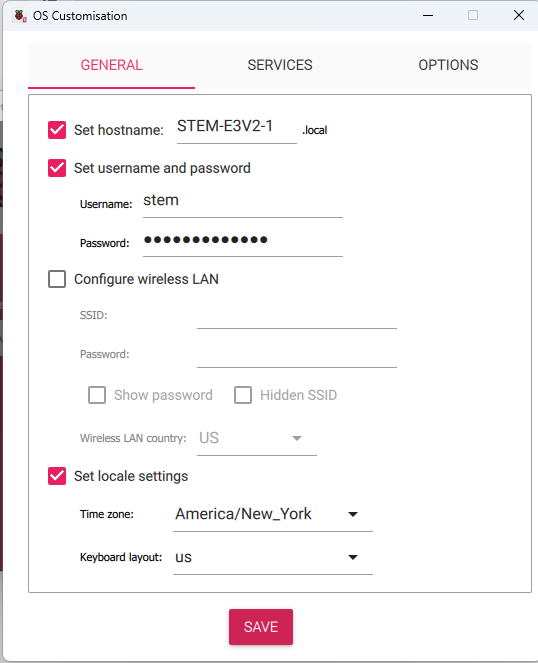
- After selecting "Next", you'll be met with this screen, Select "Edit Settings".

- General: Copy the following settings exactly:
- Set Hostname: STEM-E3V2-<PRINTERID> Replace <PRINTERID> with the number assigned to the printer, Ex: "STEM-E3V2-1"
- Set Username and Password
- Username: stem
- Password: STEMROOM6041!!
- Configure Wireless LAN: disabled
- Set Locale Settings:
- Time Zone: America/New_York
- Keyboard Layout: us

- Keyboard Layout: us
- Time Zone: America/New_York
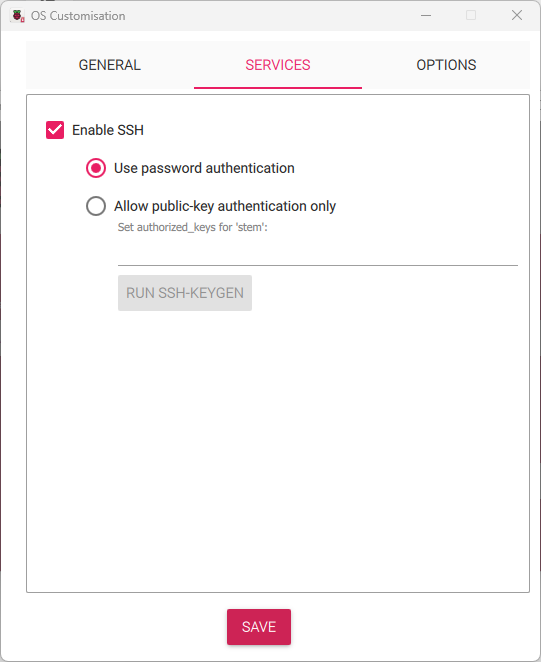
- Services: Copy the following settings exactly:
- Enable SSH: Checked
- Use Password Authentication: Bubbled

- Use Password Authentication: Bubbled
- Enable SSH: Checked
- Options: Do Not Change
Part 4. Cleanup
- Remove the SD Card from the computer, and insert it into the bottom SD Card reader on the Pi
With that, this portion of the tutorial is over. Move on to section 2 using the navigation buttons below.
2. OctoPrint Inital Setup and Printer Configuration
Part 1: Power On
Remember to use a decent power source for the Pi. A random iPhone or iPad charger will not have the ability to sustain the current required for the Pi. Use at lease a 5V 2.4A power brick.
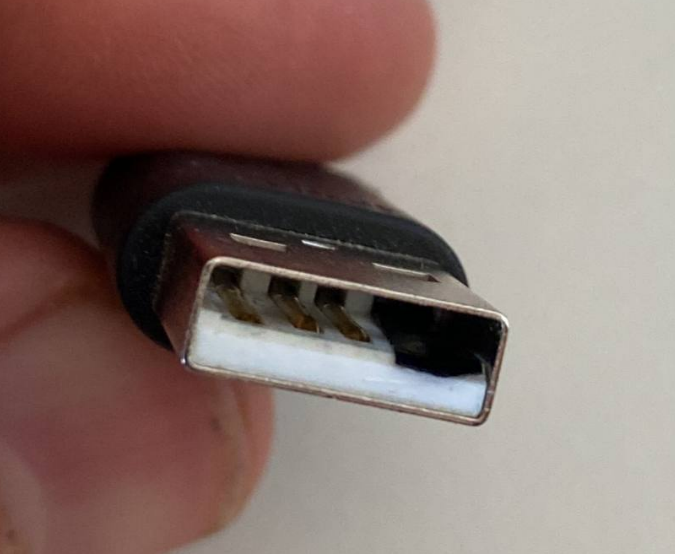
Making the following modification to the USB cable is MANDATORY!!! Ignoring these instructions could fry the printer, or the PI.
- Plug the Raspberry Pi into the 3D printer using a USB-A to Micro-USB cable.
- Take a piece of electrical tape, and use tweezers to cover the 5V power pin as shown in the following image.

- This prevents backfeeding power to the printer, and providing power to the printer even if the printer is unplugged.
- Take a piece of electrical tape, and use tweezers to cover the 5V power pin as shown in the following image.
- Plug the Raspberry Pi into a network port.
- Using an Ethernet patch cord, plug the Raspberry Pi's network port into one on the wall. If there is a network switch (hub) in place, plug the Pi into that.
-
Only ports marked: "-M", "-L1", "-L2", and "-L3" will provide data to the Pi. DO NOT USE "-V" Ports.
- Plug the Raspberry Pi into power.
- Remember to use a power source with enough capacity for the Pi. Check the top of the page for guidelines.
- Plug a camera into the Pi. (Optional)
- Plug a camera into the Pi using a USB cable or the Pi's ribbon cable interface.
Done! - At this point, wait 6 minutes until following the next steps.
Part 2: Logging In- Initial Setup
This next section is specifically focused on the Ender 3 V2 w/ Mriscoc Professional Firmware Installed. Any other printer could be damaged.
- On your web browser (Edge, Chrome, Firefox), enter the website: http://STEM-E3V2-<PRINTERID>.local Remember to change the <PRINTERID> to the one you set while imaging.
If the aforementioned address did not work, you can try: https://STEM-E3V2-<PRINTERID> -Omitting the ".local"
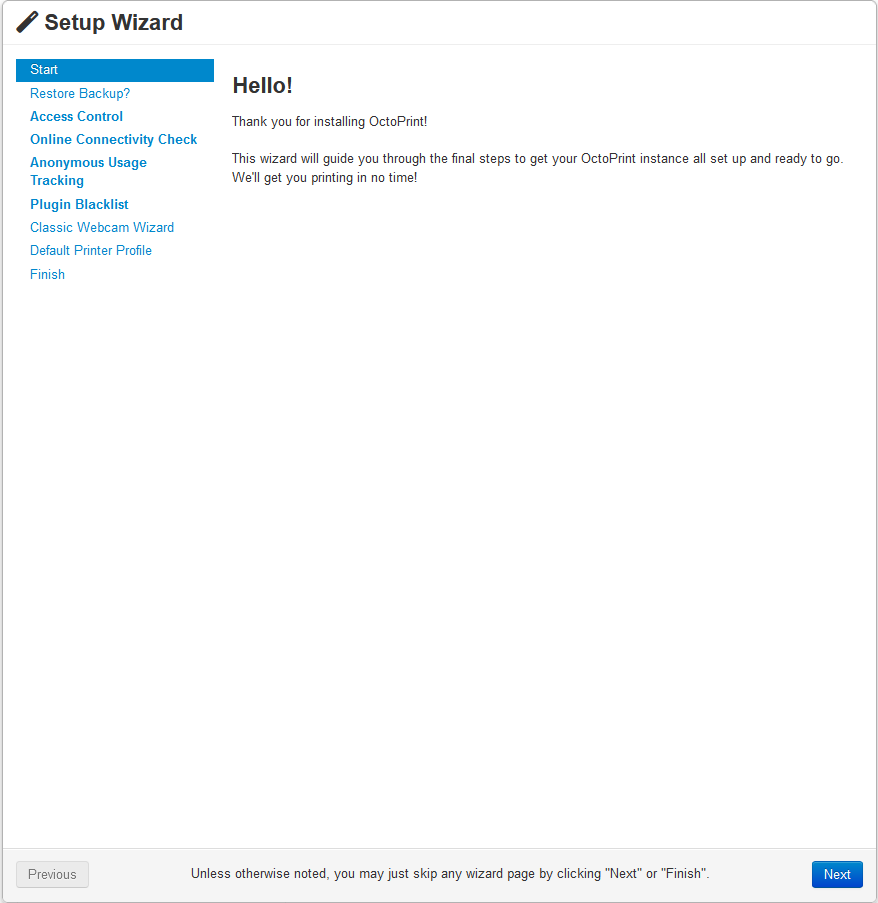
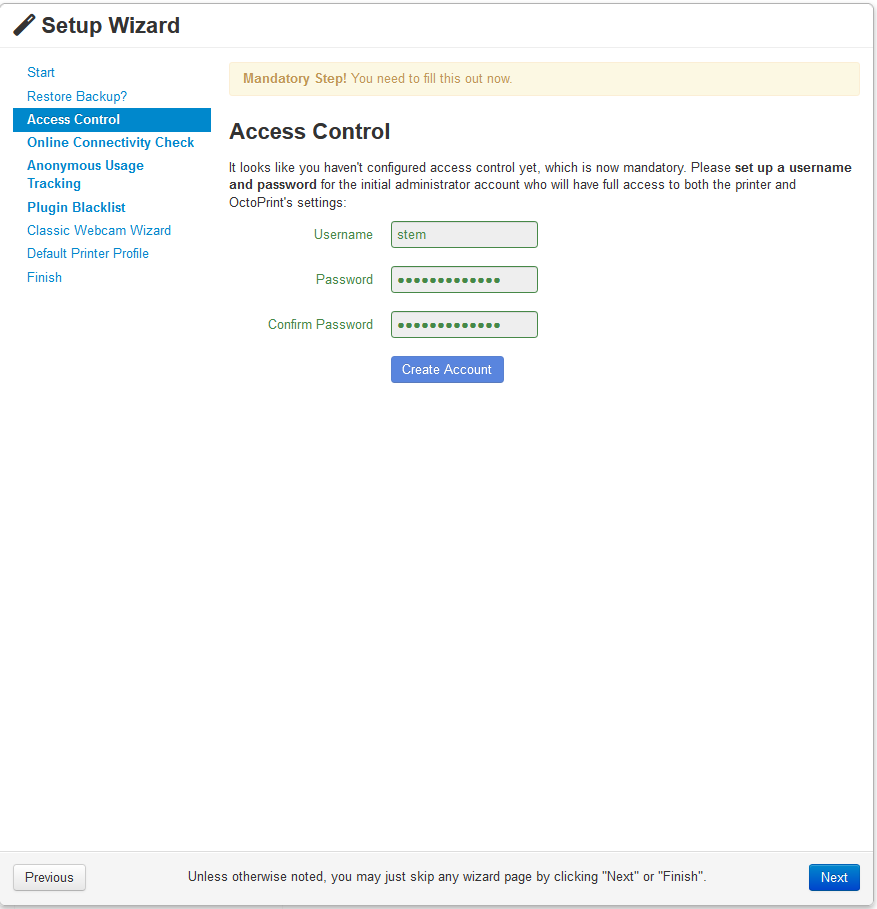
- You should be met with this screen. Skip through it and continue until you reach "Access Control".

- Set the username and password to the same as you set in the Raspberry Pi Imager:
- Username: stem
- Password: STEMROOM6041!!

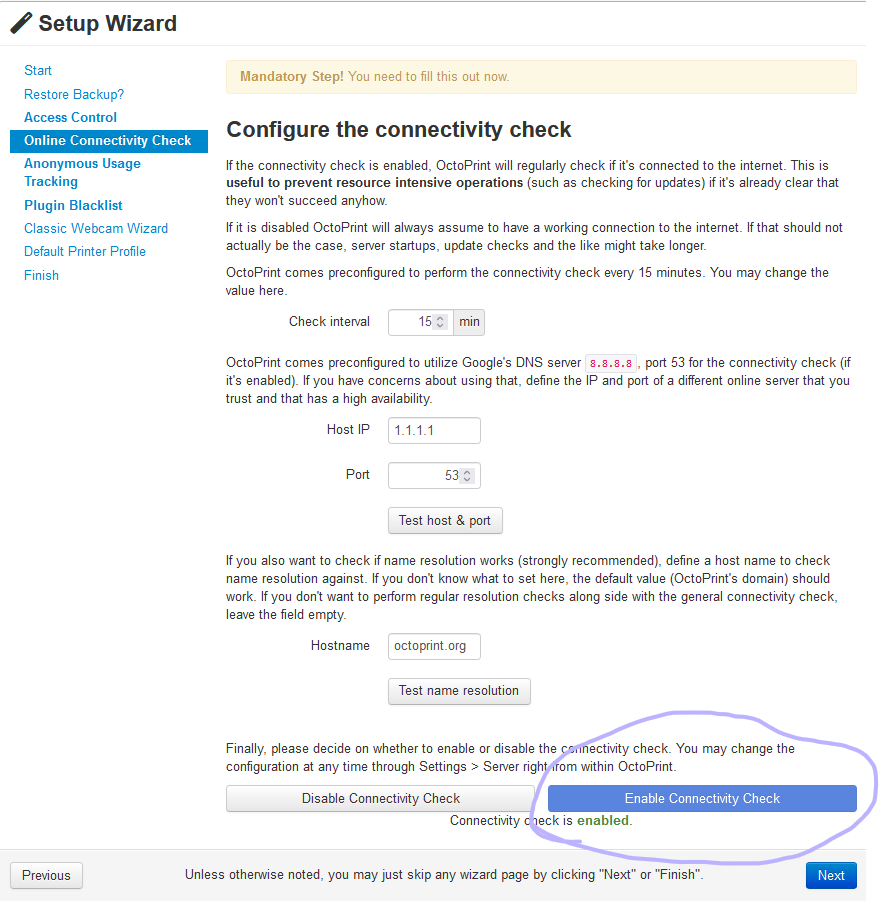
- Select "Enable Connectivity Check" and move on. Running tests is unnecessary.

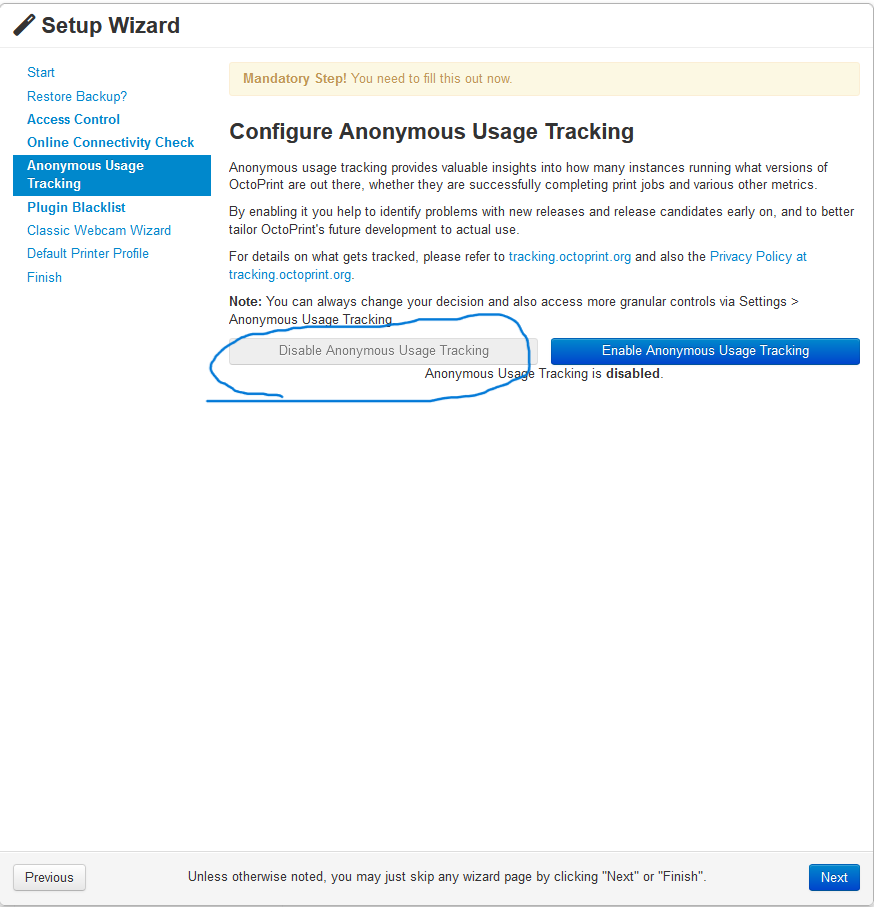
- Select "Disable Anonymous Usage Tracking", and press "Next".

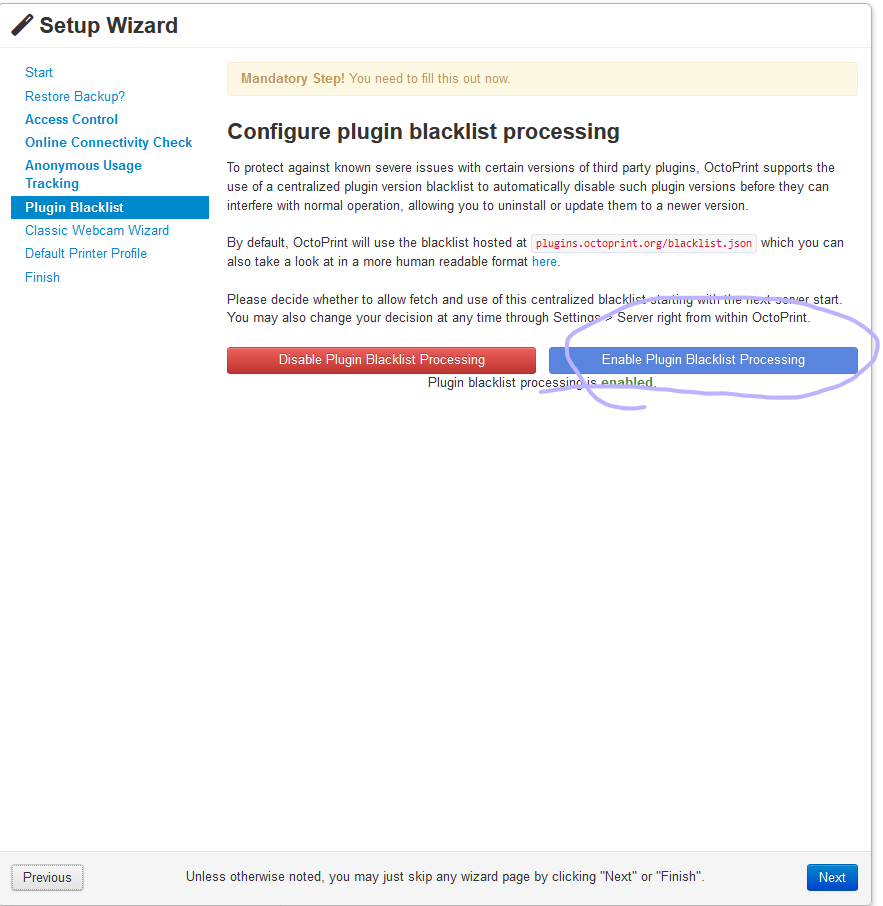
- Enable Plugin Blacklist Processing.

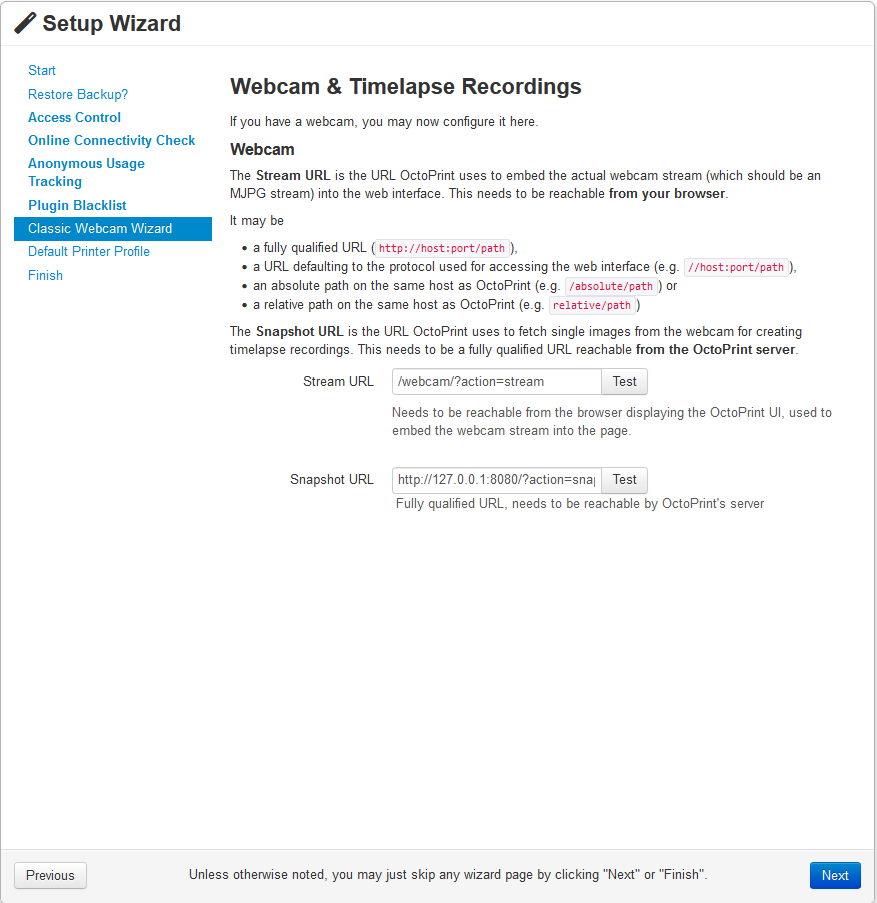
- Leave all camera settings default.

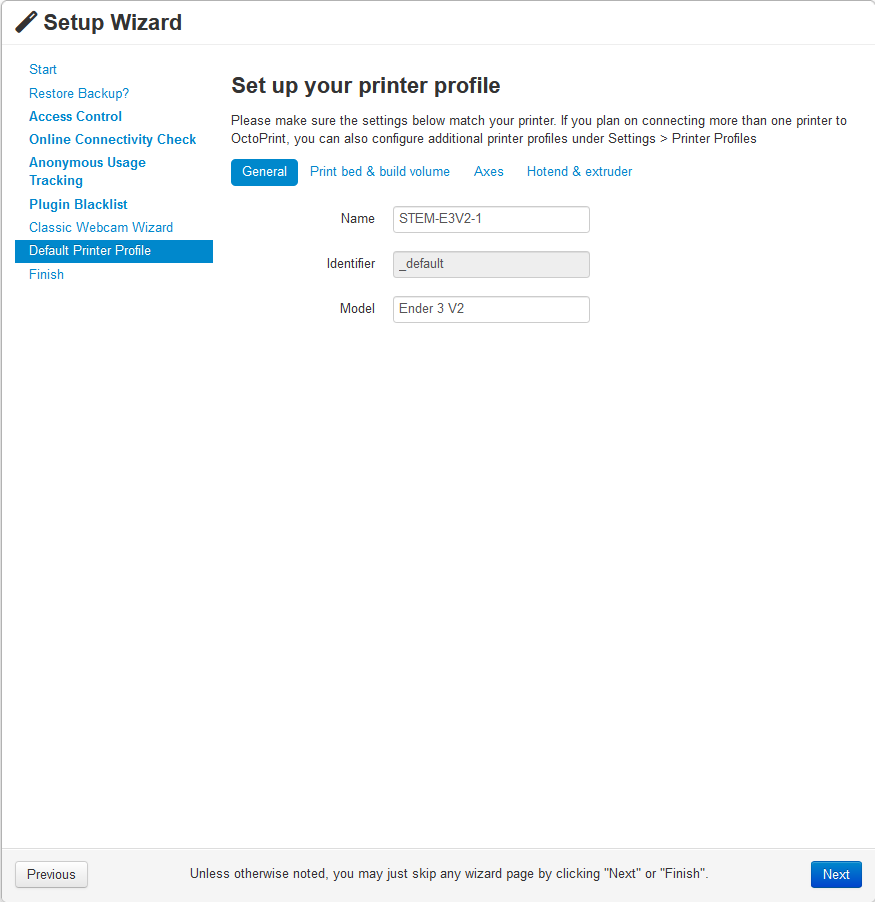
- Default Printer Profile: VERY IMPORTANT!!!
- General:
- Name: STEM-E3V2-<PRINTERID>
- Model: Ender 3 V2

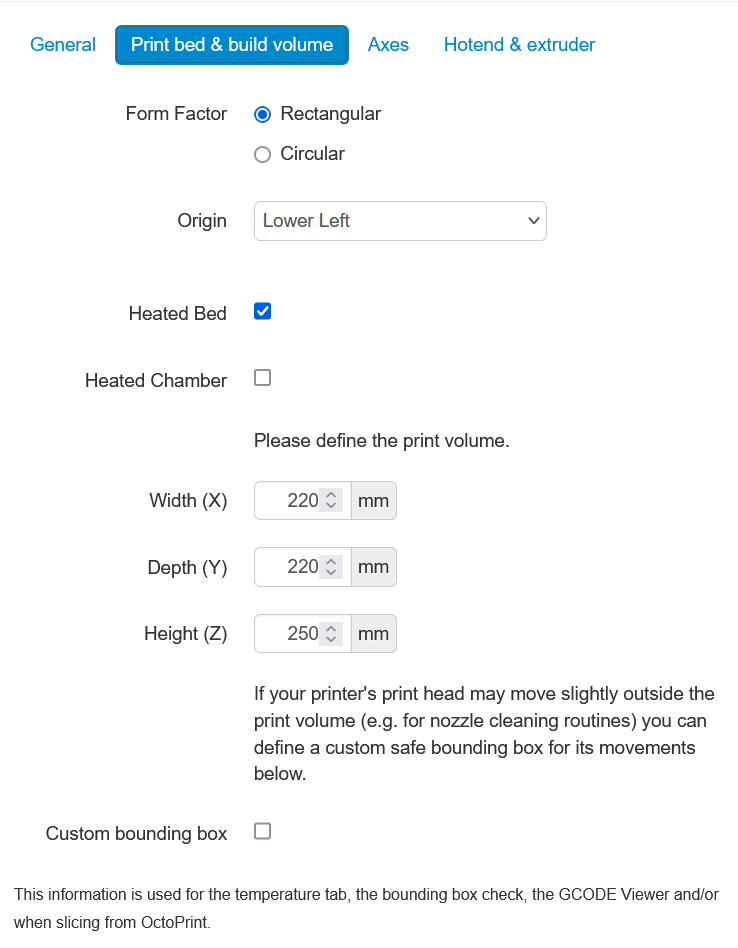
- Print Bed and Build Volume:
- Form Factor: Rectangular
- Origin: Lower Left
- Heated Bed: Yes (Checked)
- Heated Chamber: No (Unchecked)
- Width (X): 220 MM
- Depth (Y): 220 MM
- Height (X): 250 MM

- Axes: No Changes
- Hotend & Extruder: No Changes
- General:
- Select Finish
This installation is still not ready to print. Many more changes are made in the next Part.
Part 3: The Nitty-Gritty Again...
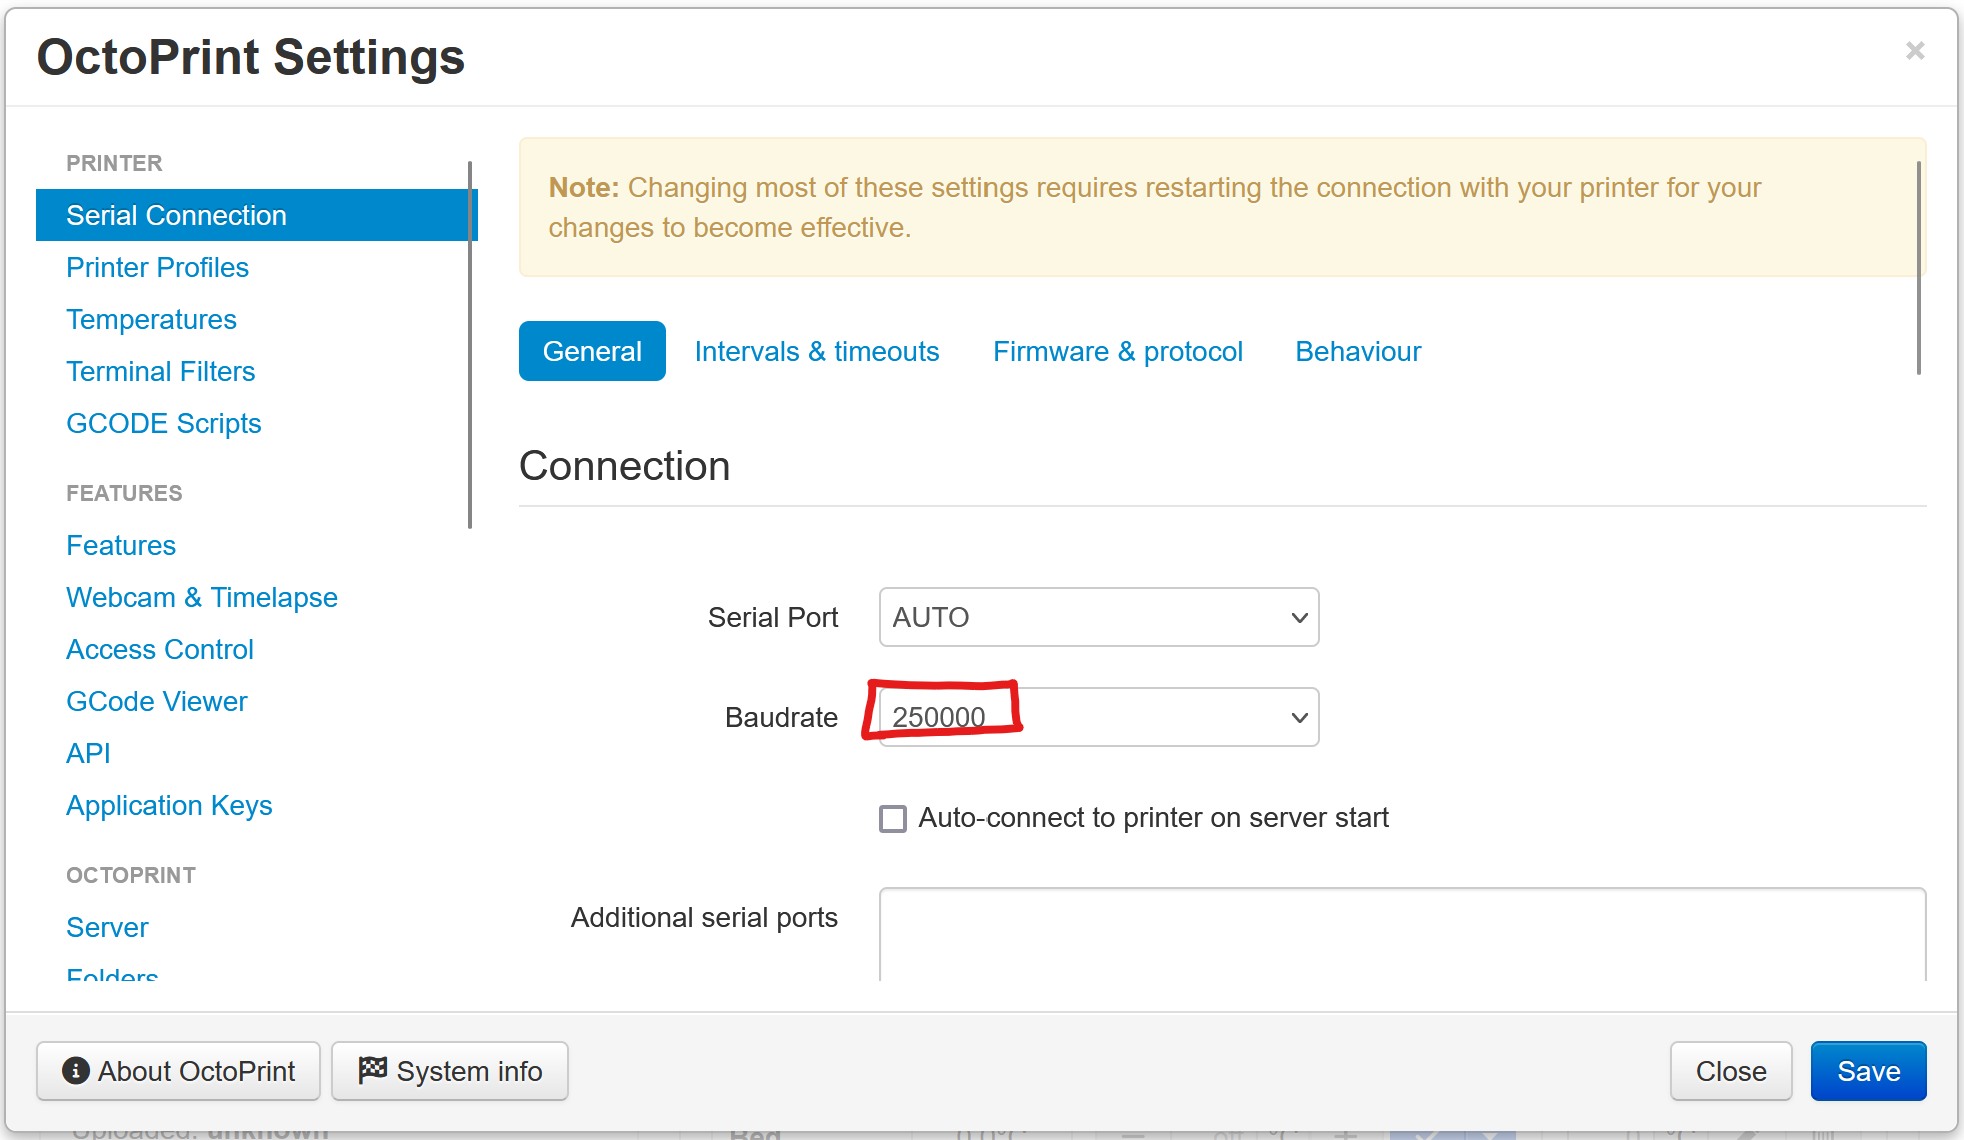
- Open the settings menu, and change the Baudrate to 250000.

- Save.
- Open the settings menu on the device, and navigate to GCODE Scripts. Copy and paste these GCODE snippets in the corresponding boxes.
- Before Print Job Starts:
M75 {{ event.name }} - After Print Job Completes:
M77 ; End print screen ;disable motors M84 ;disable all heaters {% snippet 'disable_hotends' %} {% snippet 'disable_bed' %} ;disable fan M106 S0 - After Print Job is Canceled:
M77 ; Stop print timer M117 Cancelling G27 ; Goto park position M84 ; disable motors ;disable all heaters {% snippet 'disable_hotends' %} {% snippet 'disable_bed' %} M106 S0 ; disable fan M117 Print was cancelled - After Print Job is Paused:
M76 ; Pause print screen M117 Print was paused - Before Print Job is Resumed:
M75 {{ event.name }} M117 Print was resumed - Before Tool Change: Leave Empty
- After Tool Change: Leave Empty
- After Serial Connection to Printer is Established:
M117 Octoprint is connected - Before Serial Connection to Printer is Closed:
M117 Octoprint was disconnected - Save.
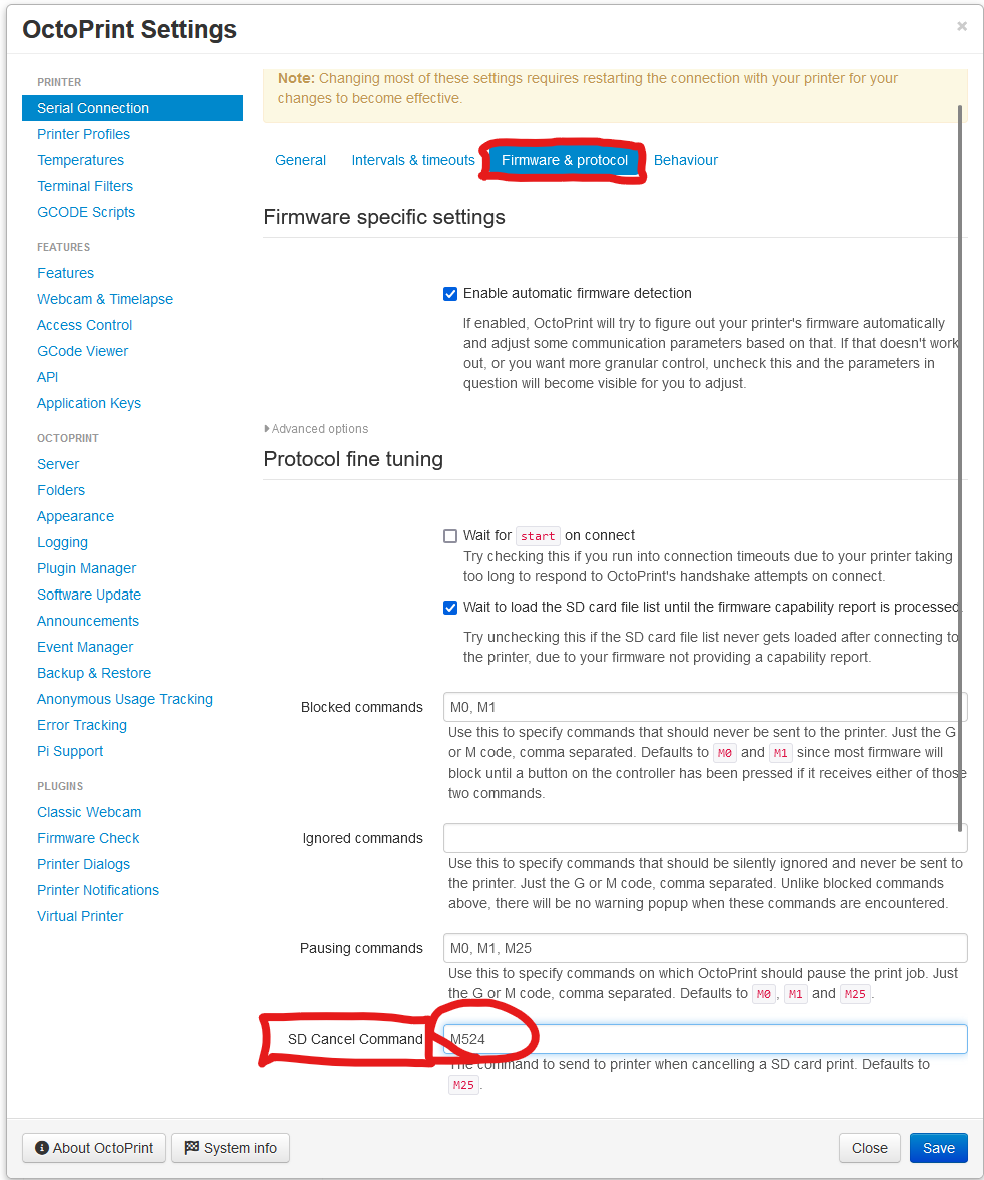
- Go back to settings. Firmware and Protocol, and scroll down to Protocol Fine Tuning. Change SD Cancel Command to M524.

- Save.
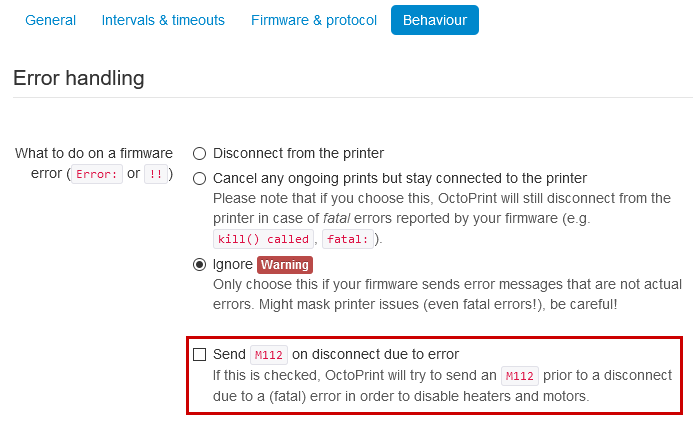
- Go back to settings. Behaviour, and select "Ignore Warning". Then check: "Send M112 on disconnect due to error."

- Before Print Job Starts: