Remember to use a decent power source for the Pi. A random iPhone or iPad charger will not have the ability to sustain the current required for the Pi. **Use at lease a 5V 2.4A power brick.**
**Making the following modification to the USB cable is MANDATORY!!! Ignoring these instructions could fry the printer, or the PI.**
1. Plug the Raspberry Pi into the 3D printer using a USB-A to Micro-USB cable. 1. Take a piece of electrical tape, and use tweezers to cover the 5V power pin as shown in the following image. [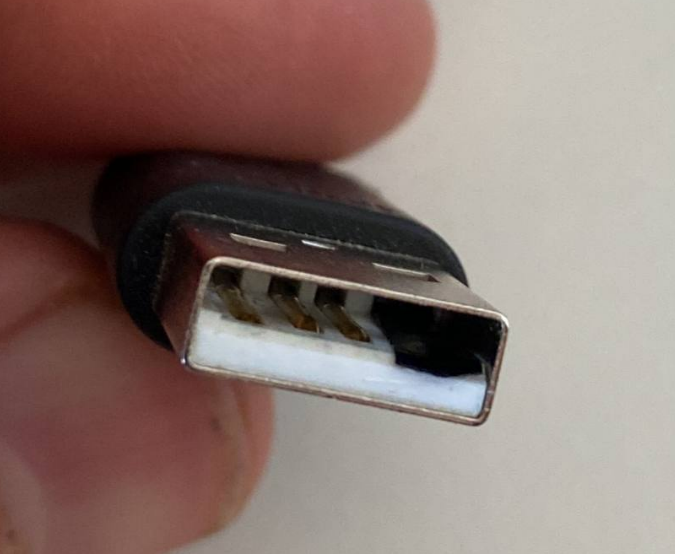](https://wiki.pwbstem.club/uploads/images/gallery/2024-04/usb-disable-v.png) 2. This prevents backfeeding power to the printer, and providing power to the printer even if the printer is unplugged. 2. Plug the Raspberry Pi into a network port. 1. Using an Ethernet patch cord, plug the Raspberry Pi's network port into one on the wall. If there is a network switch (hub) in place, plug the Pi into that. 2.Only ports marked: "-M", "-L1", "-L2", and "-L3" will provide data to the Pi. **DO NOT USE "-V" Ports.**
3. Plug the Raspberry Pi into power. 1. Remember to use a power source with enough capacity for the Pi. Check the top of the page for guidelines. 2. Plug a camera into the Pi. (Optional) 1. Plug a camera into the Pi using a USB cable or the Pi's ribbon cable interface.**Done!** - At this point, wait 6 minutes until following the next steps.
### Part 2: Logging In- Initial SetupThis next section is specifically focused on the Ender 3 V2 w/ [Mriscoc Professional Firmware](https://github.com/mriscoc/Ender3V2S1) Installed. Any other printer could be damaged.
1. On your web browser (Edge, Chrome, Firefox), enter the website: http://STEM-E3V2-<PRINTERID>.local **Remember to change the <PRINTERID> to the one you set while imaging.**If the aforementioned address did not work, you can try: https://STEM-E3V2-<PRINTERID> **-Omitting the ".local"**
2. You should be met with this screen. **Skip through it and continue until you reach "Access Control"**. [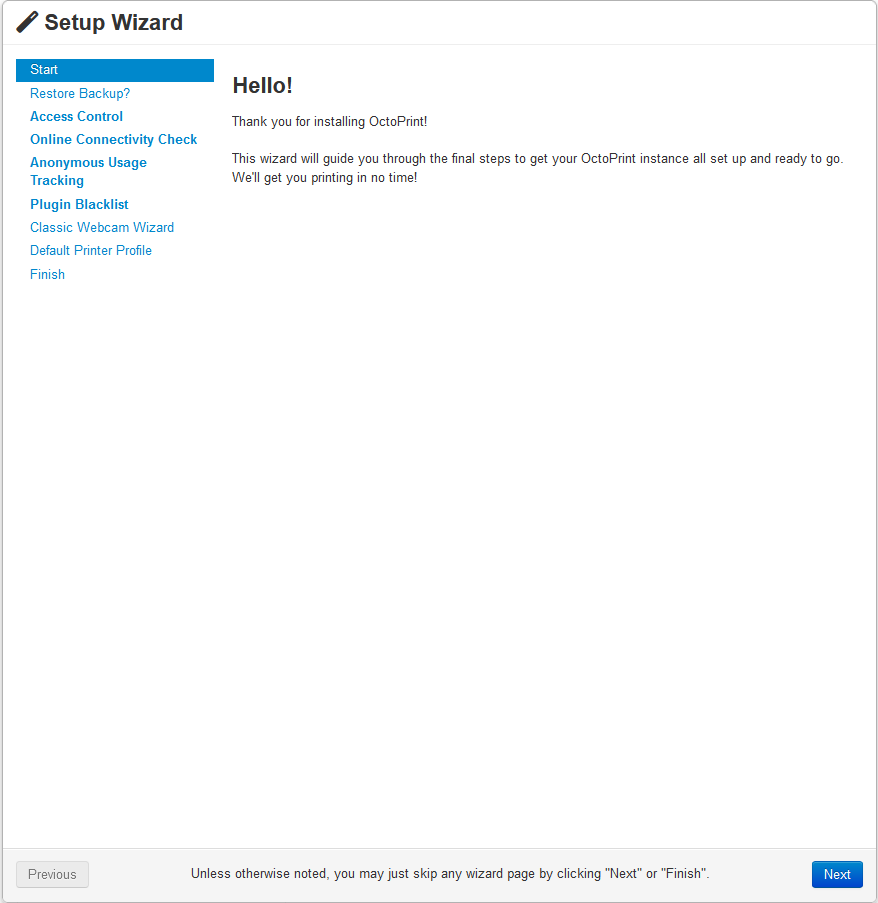](https://wiki.pwbstem.club/uploads/images/gallery/2024-04/jOiimage.png) 3. Set the username and password to the same as you set in the Raspberry Pi Imager: 1. Username: **stem** 2. Password: **STEMROOM6041!!**[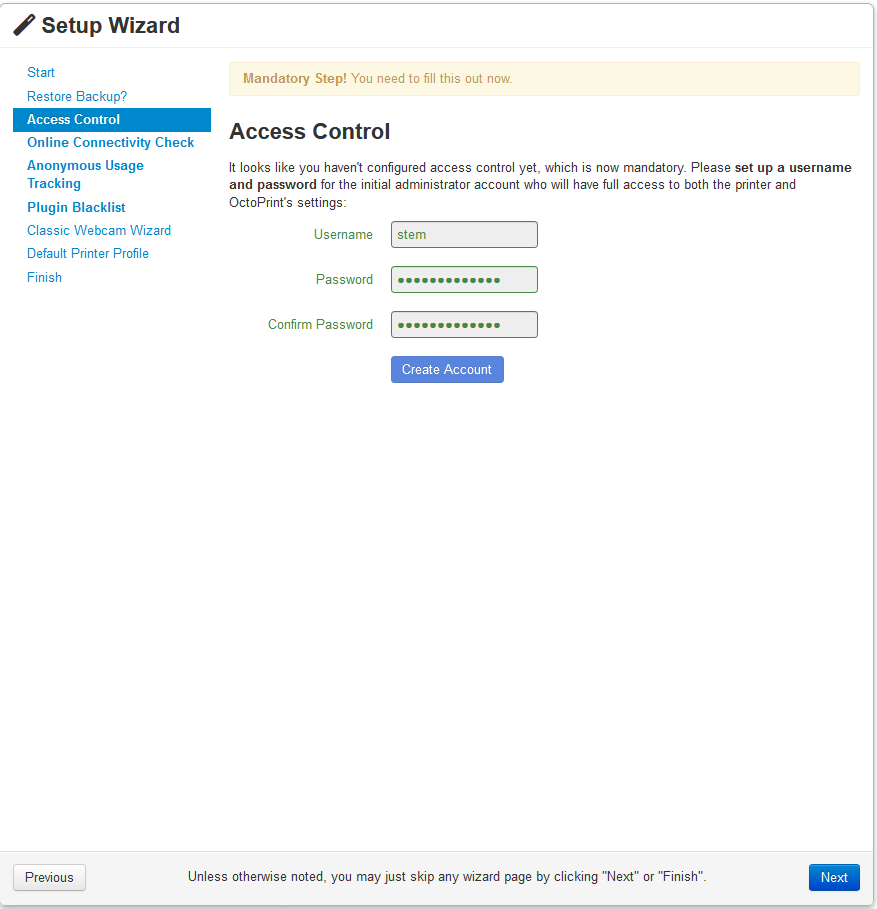](https://wiki.pwbstem.club/uploads/images/gallery/2024-04/bpjimage.png) 4. Select "Enable Connectivity Check" and move on. **Running tests is unnecessary.**[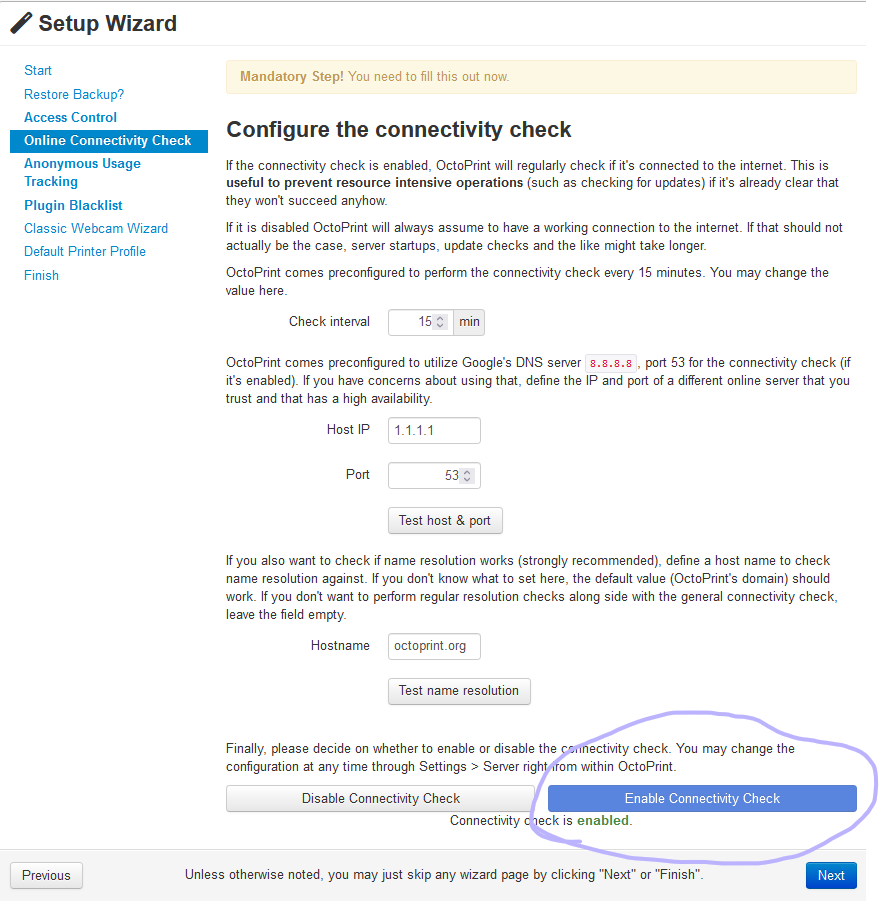](https://wiki.pwbstem.club/uploads/images/gallery/2024-04/mpCimage.png) 5. Select "Disable Anonymous Usage Tracking", and press "Next". [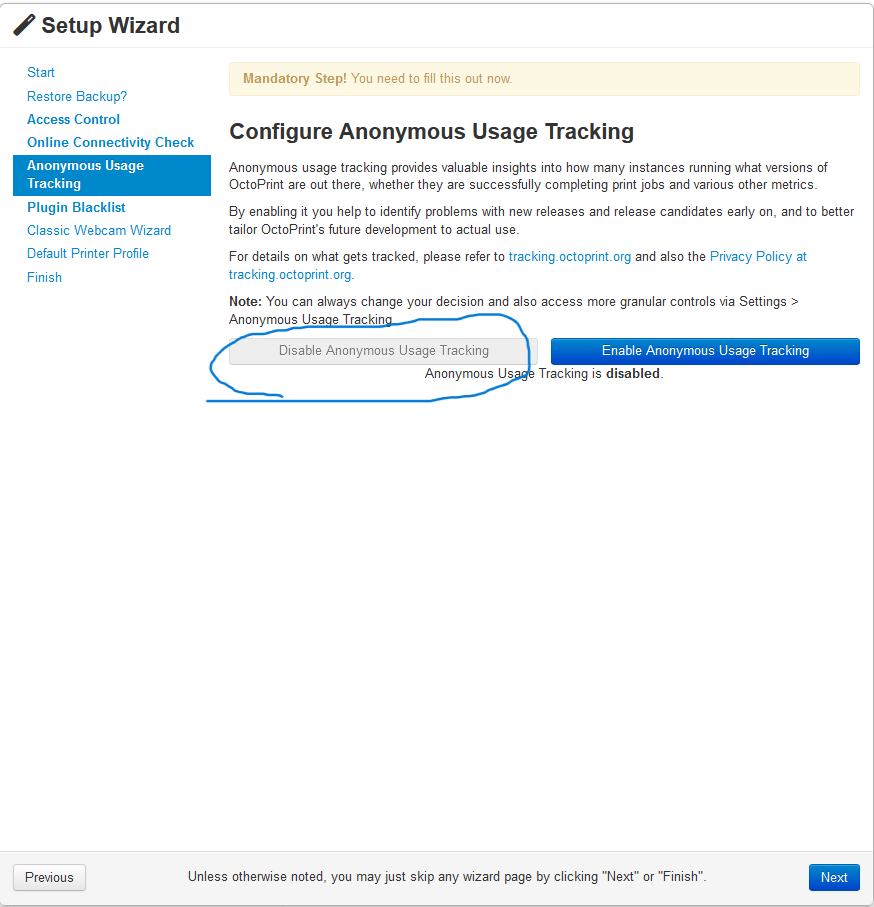](https://wiki.pwbstem.club/uploads/images/gallery/2024-04/6zVimage.png) 6. Enable Plugin Blacklist Processing. [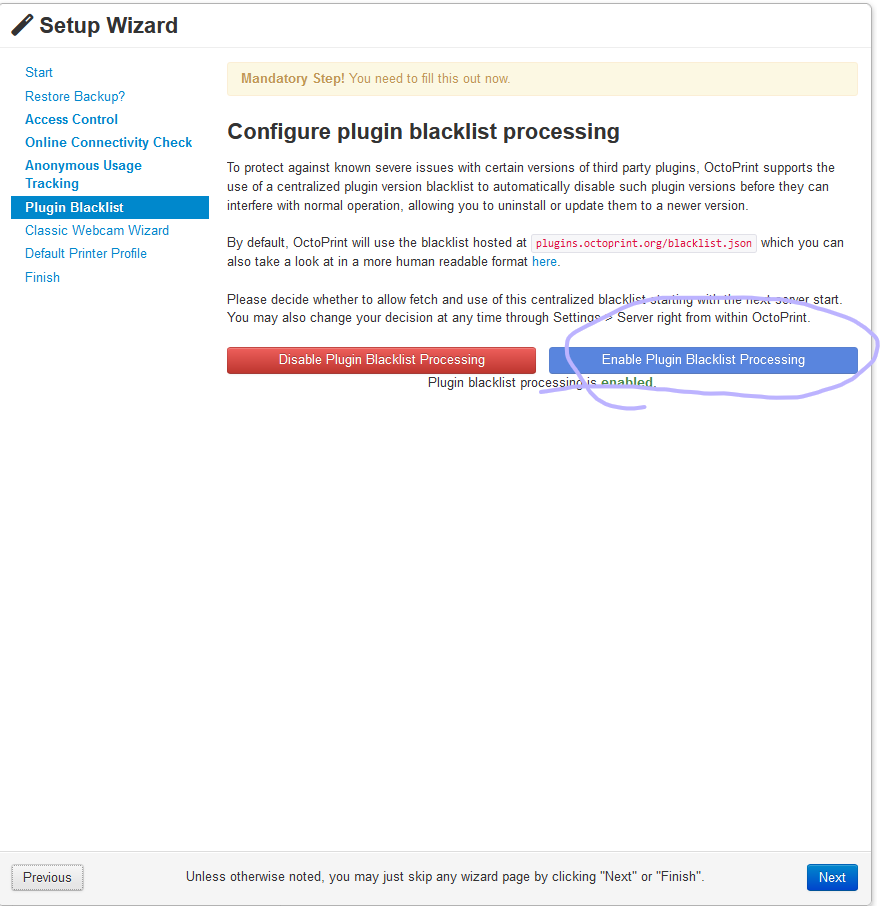](https://wiki.pwbstem.club/uploads/images/gallery/2024-04/FcZimage.png) 7. **Leave all camera settings default.**[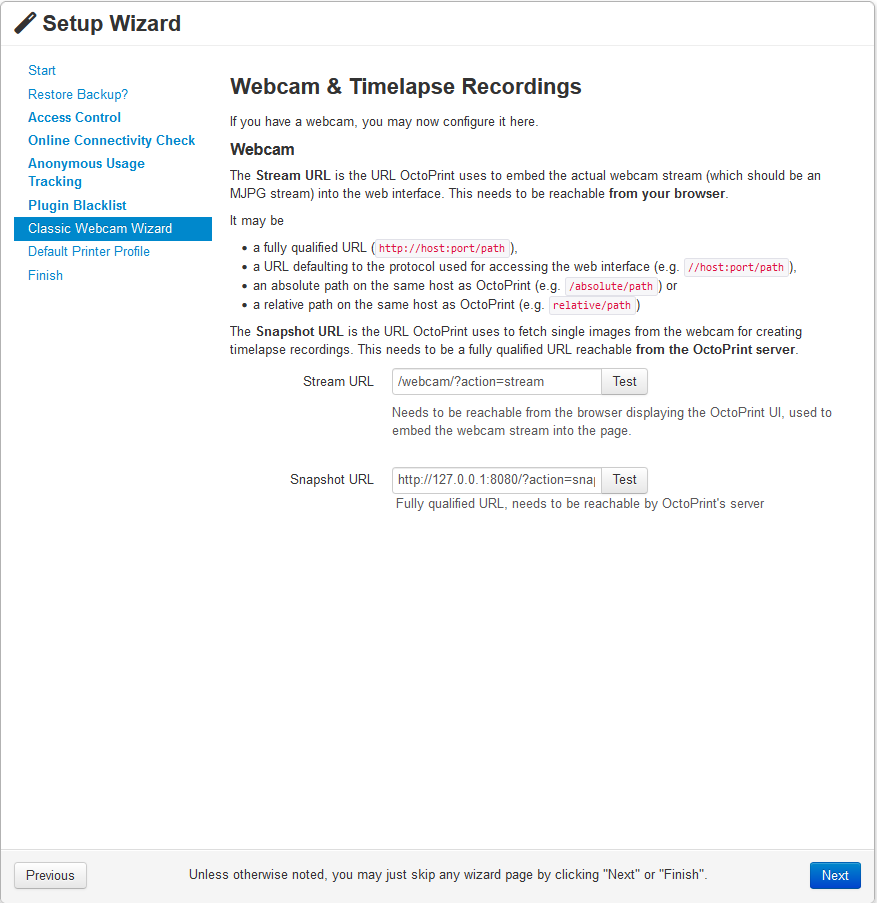](https://wiki.pwbstem.club/uploads/images/gallery/2024-04/u9Simage.png) 8. Default Printer Profile: **VERY IMPORTANT!!!** 1. General: 1. Name: **STEM-E3V2-<PRINTERID>** 2. Model: **Ender 3 V2**[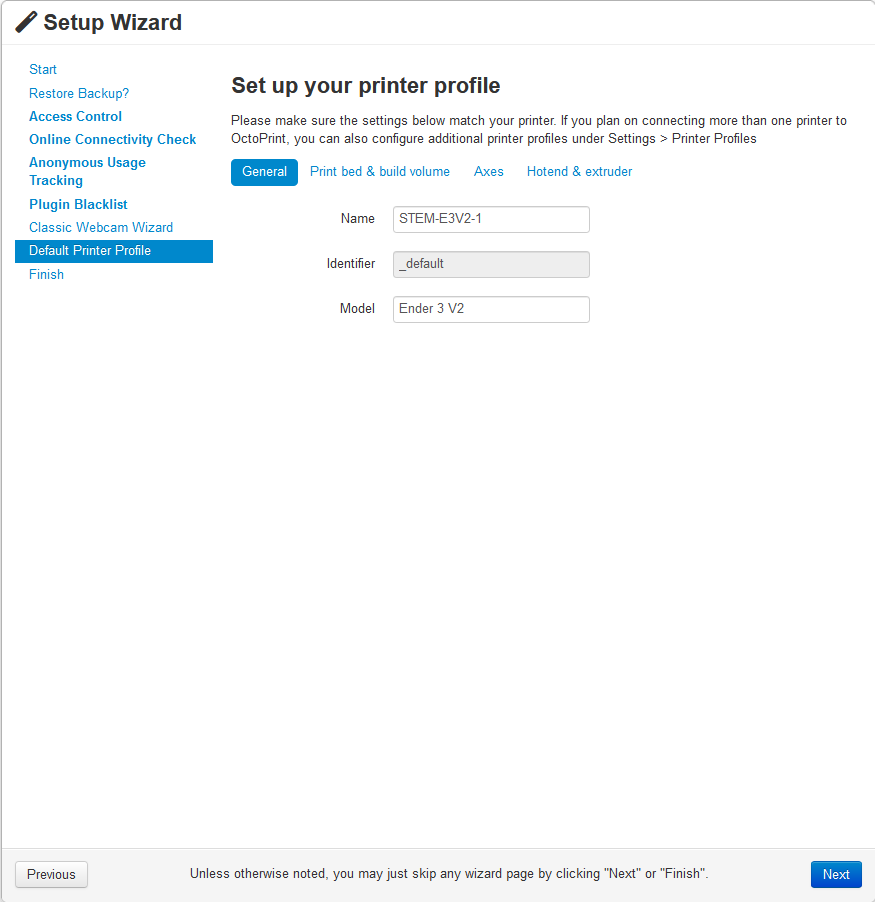](https://wiki.pwbstem.club/uploads/images/gallery/2024-04/2DMimage.png) 2. Print Bed and Build Volume: 1. Form Factor: **Rectangular** 2. Origin: **Lower Left** 3. Heated Bed: **Yes (Checked)** 4. Heated Chamber: **No (Unchecked)** 5. Width (X): **220 MM** 6. Depth (Y): **220 MM** 7. Height (X): **250 MM**[](https://wiki.pwbstem.club/uploads/images/gallery/2024-04/XEcimage.png) 3. Axes: **No Changes** 4. Hotend & Extruder: **No Changes** 9. **Select Finish****This installation is still not ready to print. Many more changes are made in the next Part.**
### Part 3: The Nitty-Gritty Again... 1. Open the settings menu, and **change the Baudrate to 250000.**[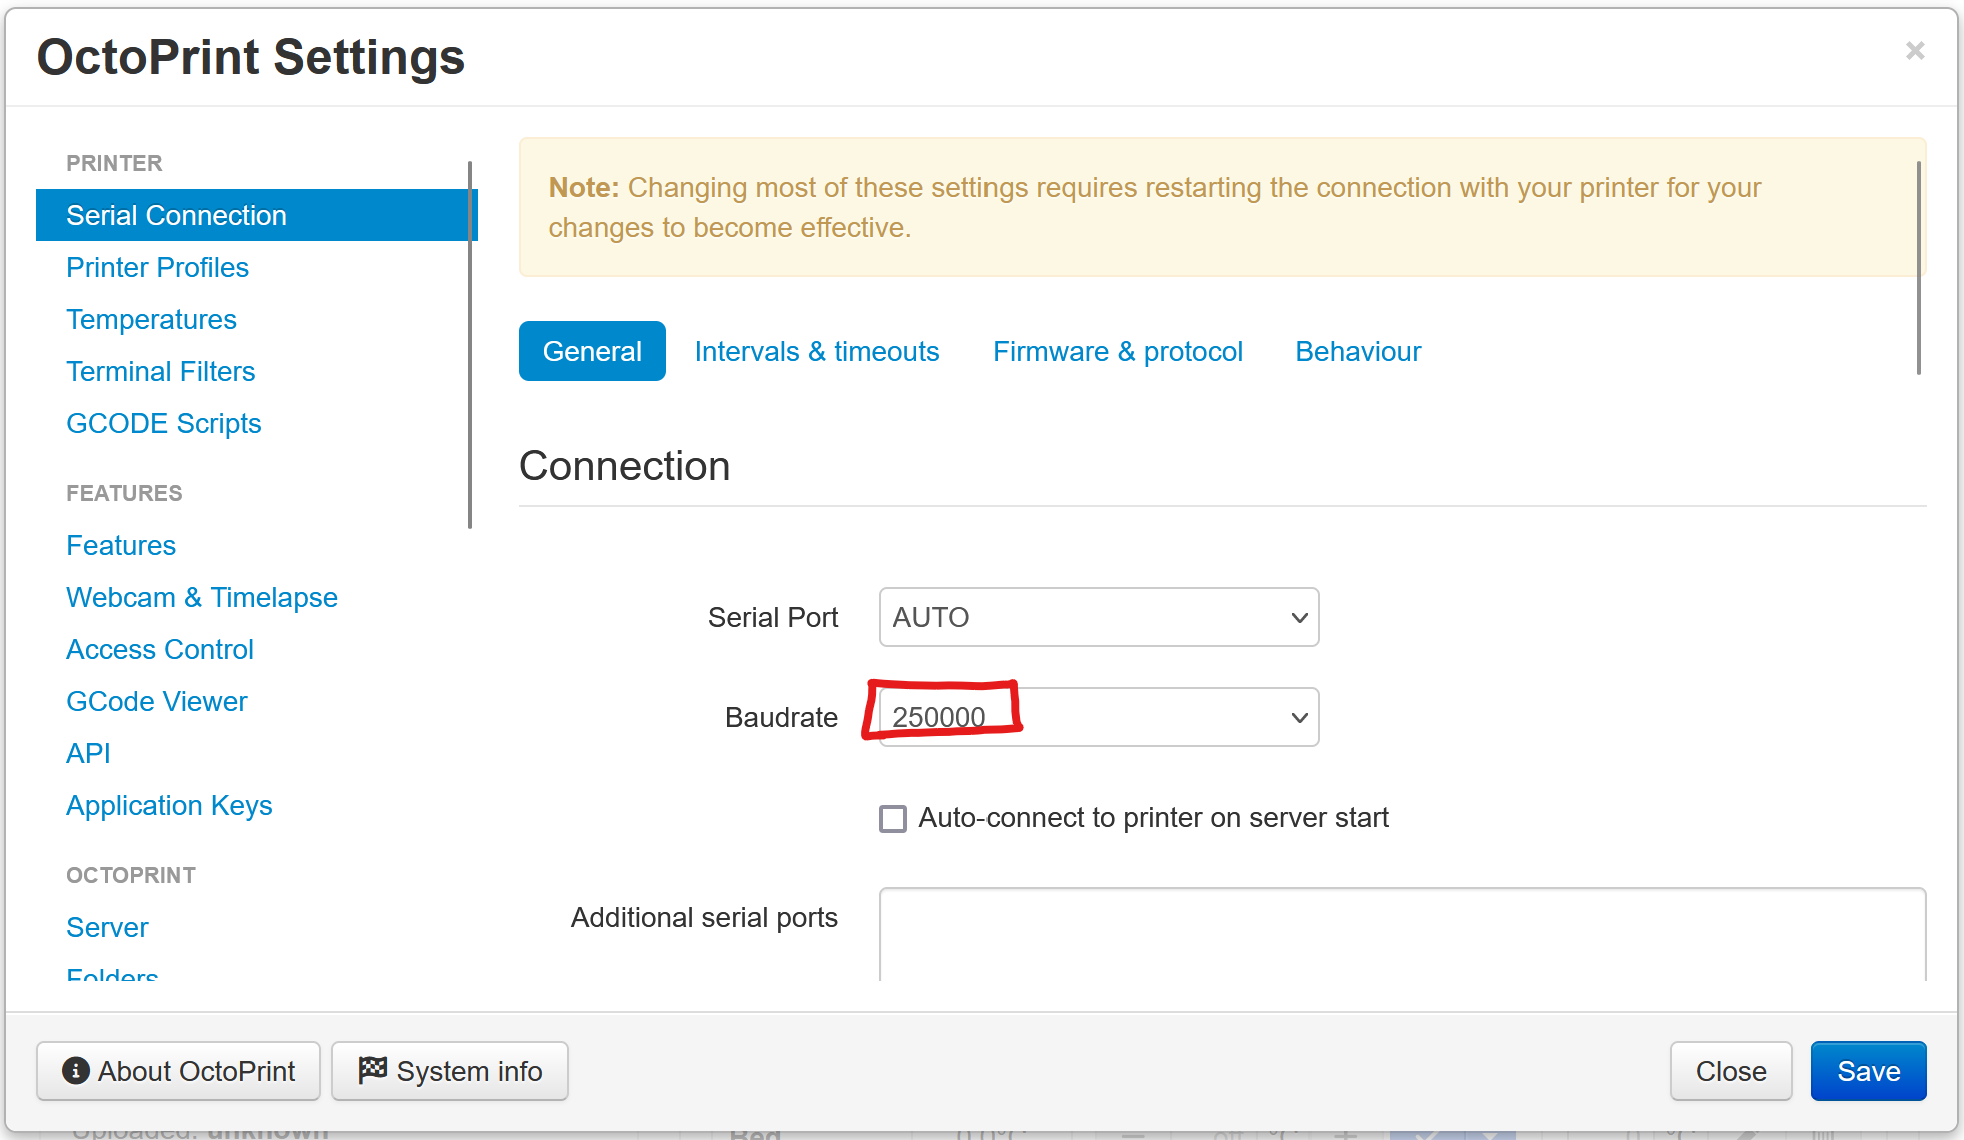](https://wiki.pwbstem.club/uploads/images/gallery/2024-04/1taimage.png) 2. **Save.** 3. Open the settings menu on the device, and navigate to **GCODE Scripts**. Copy and paste these GCODE snippets in the corresponding boxes. 1. **Before Print Job Starts:**``` M75 {{ event.name }} ``` 2. **After Print Job Completes:**``` M77 ; End print screen ;disable motors M84 ;disable all heaters {% snippet 'disable_hotends' %} {% snippet 'disable_bed' %} ;disable fan M106 S0 ``` 3. **After Print Job is Canceled:**``` M77 ; Stop print timer M117 Cancelling G27 ; Goto park position M84 ; disable motors ;disable all heaters {% snippet 'disable_hotends' %} {% snippet 'disable_bed' %} M106 S0 ; disable fan M117 Print was cancelled ``` 4. **After Print Job is Paused:**``` M76 ; Pause print screen M117 Print was paused ``` 5. **Before Print Job is Resumed:**``` M75 {{ event.name }} M117 Print was resumed ``` 6. **Before Tool Change: Leave Empty** 7. **After Tool Change: Leave Empty** 8. **After Serial Connection to Printer is Established:**``` M117 Octoprint is connected ``` 9. **Before Serial Connection to Printer is Closed:**``` M117 Octoprint was disconnected ``` 10. **Save.** 11. Go back to settings. Firmware and Protocol, and scroll down to Protocol Fine Tuning. **Change SD Cancel Command to M524.**[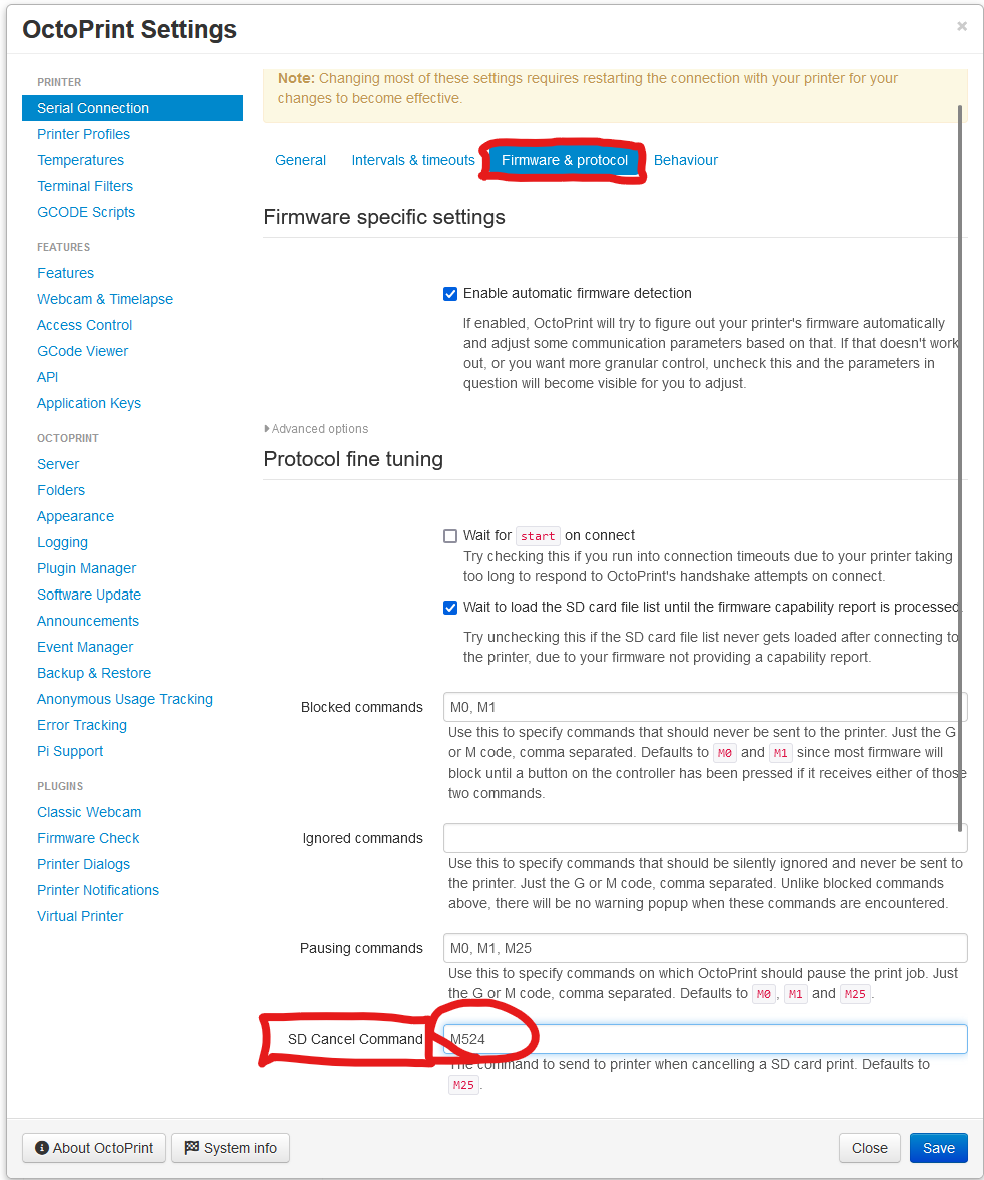](https://wiki.pwbstem.club/uploads/images/gallery/2024-04/KbZimage.png) 12. **Save.** 13. Go back to settings. Behaviour, and select "Ignore Warning". Then check: **"Send M112 on disconnect due to error."**[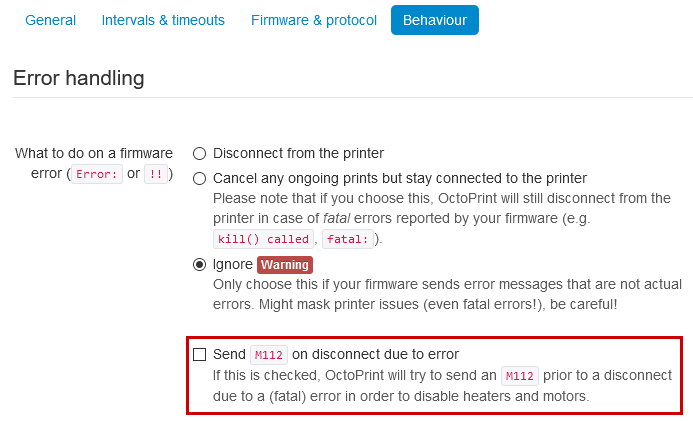](https://wiki.pwbstem.club/uploads/images/gallery/2024-04/octoprint-error-handling.png)