Installing An OS!
Step 1: Prerequisite Software Installation
- Raspberry Pi Imager - You'll use this to install the OS on the PiCar, and change some settings to get it connecting.
- Putty - This is used as a remote terminal for the Pi. Because the PiCar will be roaming without a display, this allows easier access and copy/paste.
-
- Installation should be pretty simple. Just click through the prompts, and use the default settings.
- After it gets installed, you can close out of the notepad opened.
Step 2: Let's Get Started! - Install the OS
Are you ready? Let's put some of those prereqs to work!
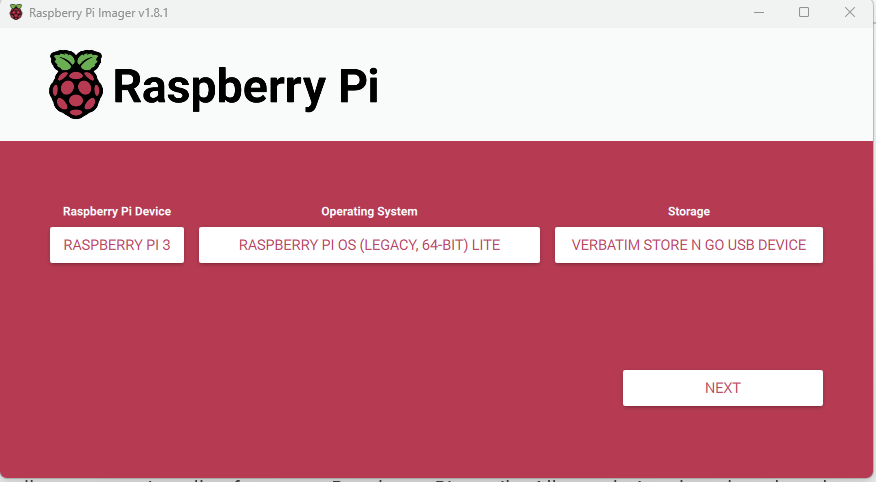
- Open Raspberry Pi Imager
- Insert a Micro SD Card to put in the Raspberry Pi for the OS.
- The Raspberry Pi Device is "Raspberry Pi 3
- The Operating System is "Raspberry Pi OS (Legacy 64-bit) Lite)"
- Make sure the storage device is the SD card for the PiCar.
- Press "Next", and then Select "Edit Settings"
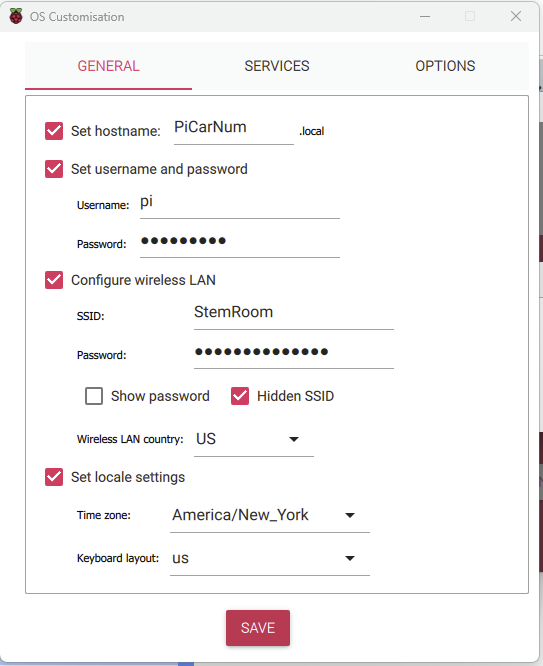
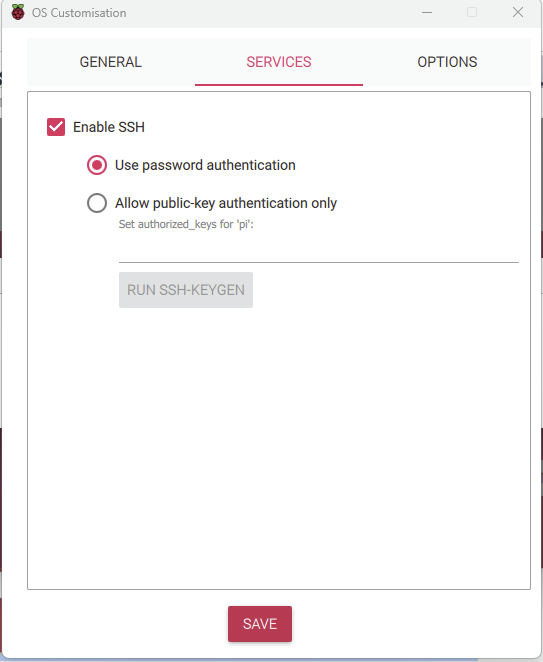
Copy these settings exactly:
Wifi Passwords In the future, to make these roam long range, the STEM "Travel Router" will be setup.
Replace "PiCarNum" with PiCar followed by the ID (1,2,3, or 4) Ex: "PiCar2"
For the password, use
You can leave the options tab default.


