1. Overview and OS Image
This process can get a little intense, as you may need to use the command line, or input code in OctoPrint. If you're familiar with SBCs (Single Board Computers) and 3D Printing, this will be simple.
What is a Raspberry Pi?
A Raspberry Pi is a SBC (Single Board Computer) with a small processor and low power consumption. These can be used for an extremely wide variety of tasks. From turning light on and off, to creating websites. These can do it all. This tutorial uses them for OctoPrint.
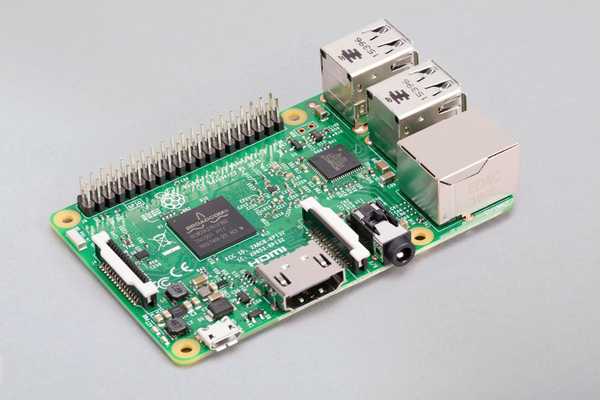
Image of a Pi 3B+
What is OctoPrint?
OctoPrint is a piece of software that runs on a computer connected to a 3D printer. Usually, this device is a 'dumb' 3D printer like an Ender 3 (or in our case, an Ender 3 V2). This software allows remote control of almost all functions in the device, except for manual adjustments or leveling.
It is recommended to only run one printer per-Pi. While it is possible to run more, it is not supported by OctoPrint's developers, and is not usable on a Raspberry Pi 3B+.
Why do this?
OctoPrint can be helpful for many things. The most important of which is remote management. It allows you to ditch the SD card, and print over the network with a simple (and beautiful) UI. It also can help in printer troubleshooting, filament cost estimations, and more.
Requirements
- Laptop (Preferably windows)
- Raspberry Pi 3B+ (During the release of this document, the Raspberry Pi 5 has just been released.. As of writing this, the STEM club does not own any Pi 4s, 5s, or 0s. This documentation is strictly based on this model.).
- USB Cable (A to whatever the printer has).
- Micro-SD Card ⪰ 8GB.
- Basic networking and extensive 3D printing knowledge.
- Travel router, standard router, or a mobile hotspot with Ethernet (Mrs. Menocal's "AirCard")
Optional Hardware
- Pi Camera or Webcam
- Raspberry Pi Case (Heat-sink strongly recommended
This guide is made for use with a Windows PC, but should be suitable for other Operating Systems as well,
Part 0: Basic Hardware Info
The printer this tutorial is specifically made for is the Ender 3 V2. The PWB STEM Club has 3 E3V2s, and if devices need to be reset or new printers are getting set-up, this tutorial can be used.
Part 1: PC Software
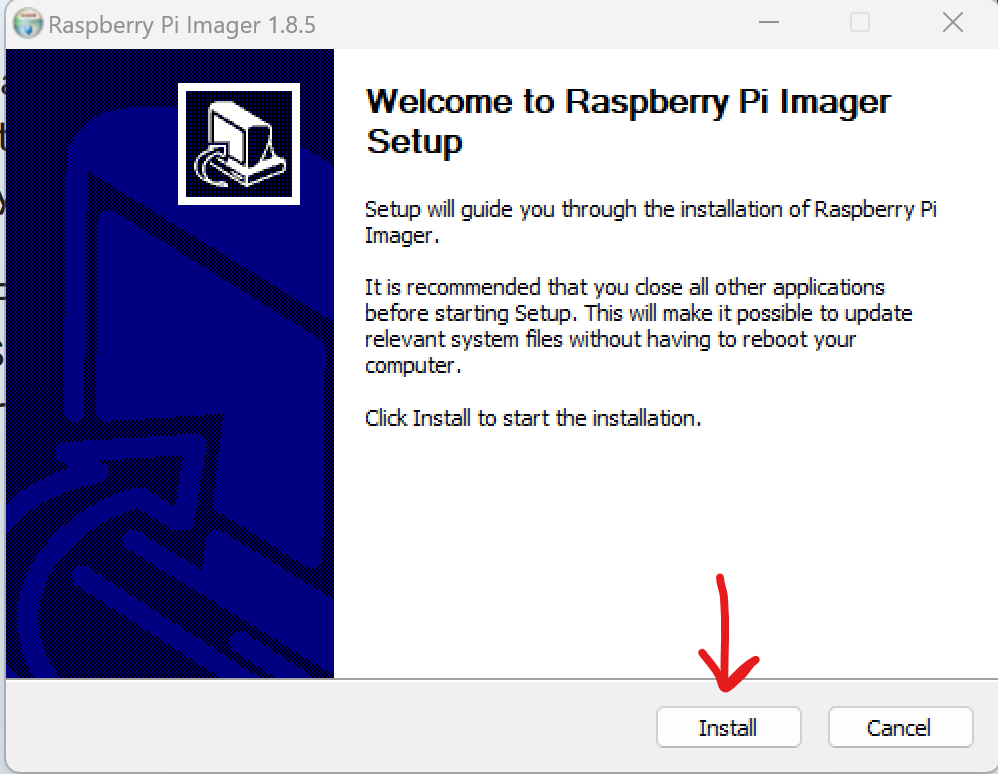
1. On your computer, install the Raspberry Pi Imager
Select download for windows (on a windows PC), or whatever suits your OS.
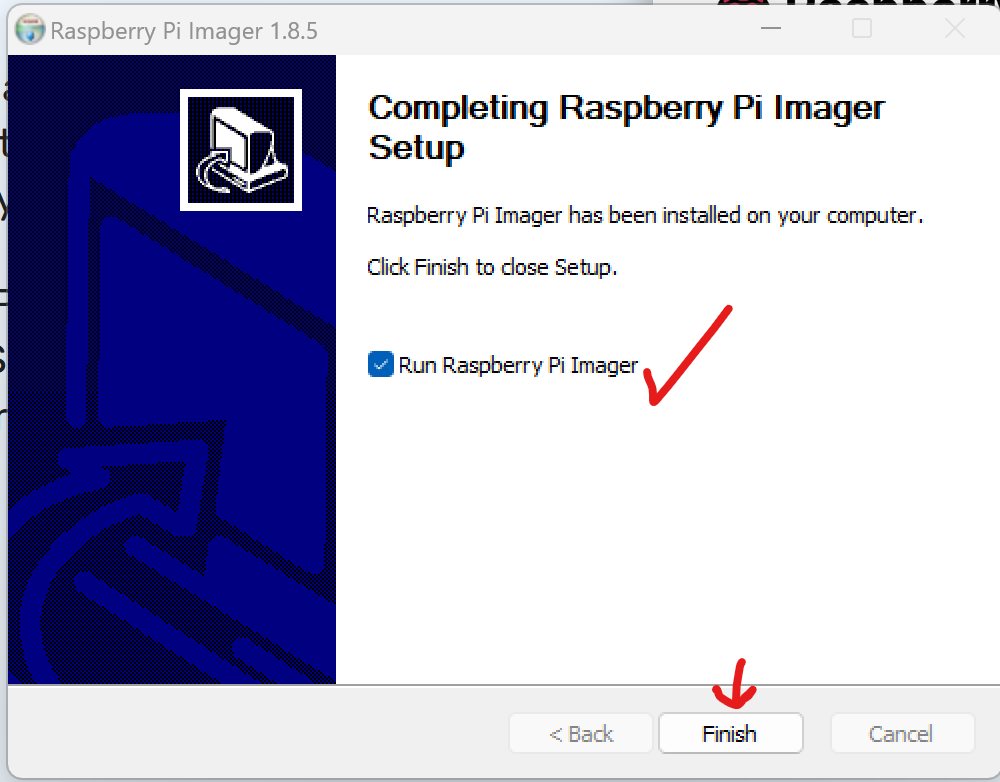
2. Go through the installer, leaving all defaults.
"Run Raspberry Pi Imager" should stay enabled.
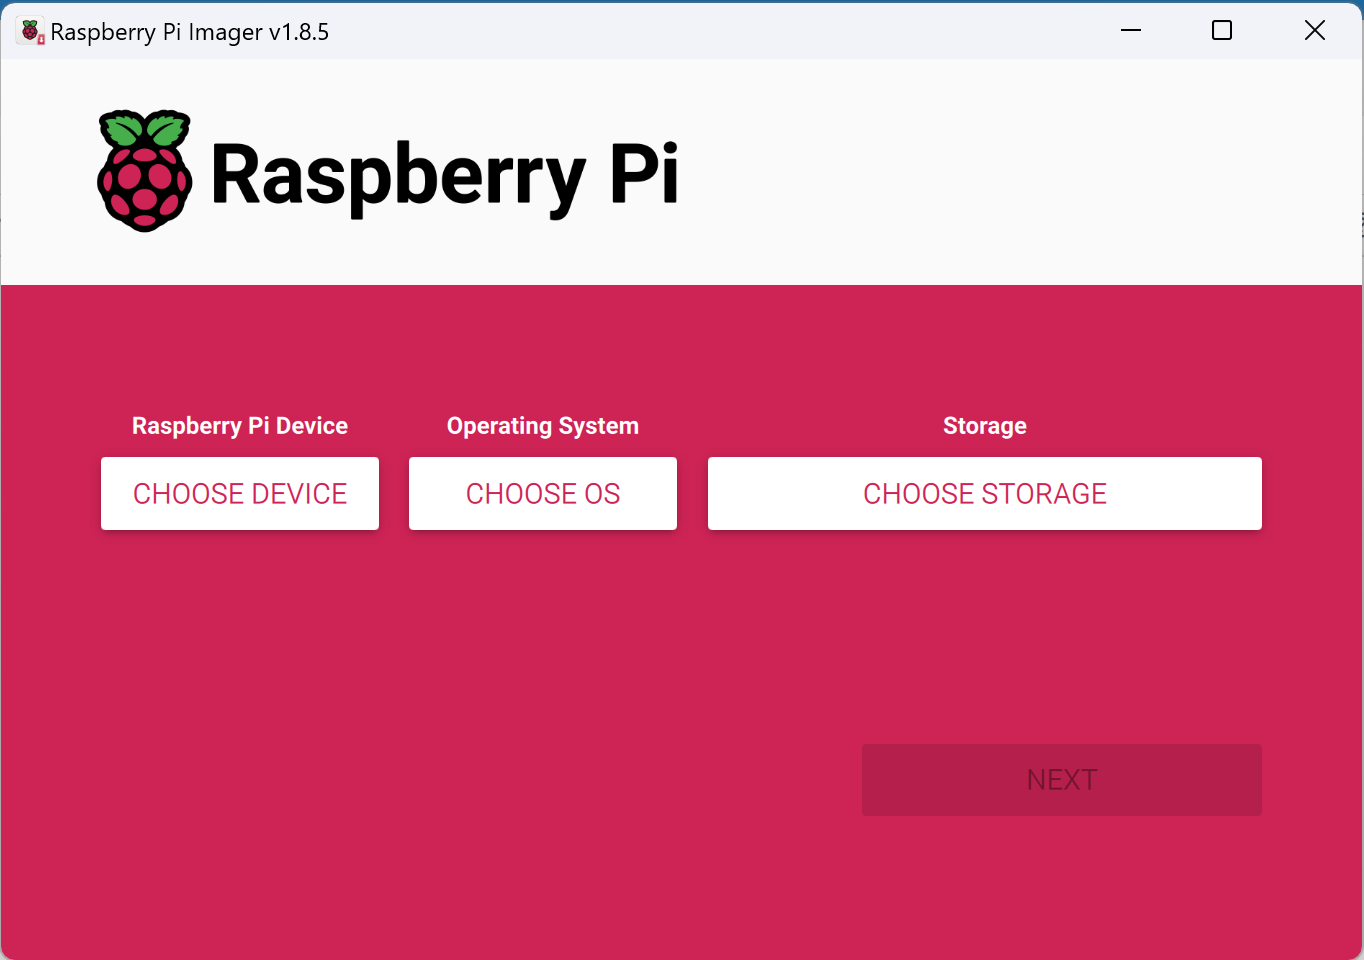
Once you see this screen, you're all set!
Part 2: Select the Image
Using an SD Card (8Gb or greater) and the Raspberry Pi Imager, you can setup the SD Card for easy installation of OctoPrint.
At this point, insert the SD Card in the computer with the Raspberry Pi Imager installed.
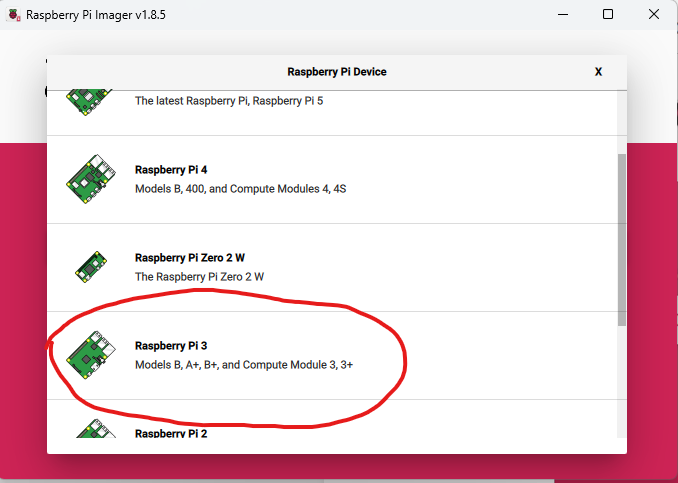
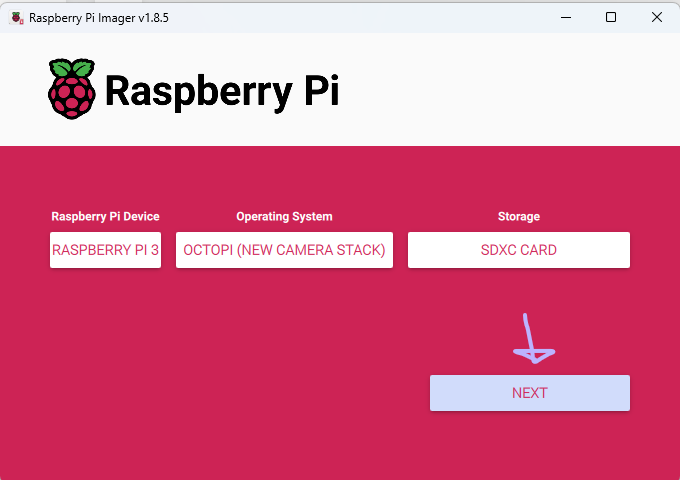
1. In Raspberry Pi Imager, select "Choose Device". This is where you will select the Raspberry Pi model that the software will be installed on. In this case, we'll use a Raspberry Pi 3.
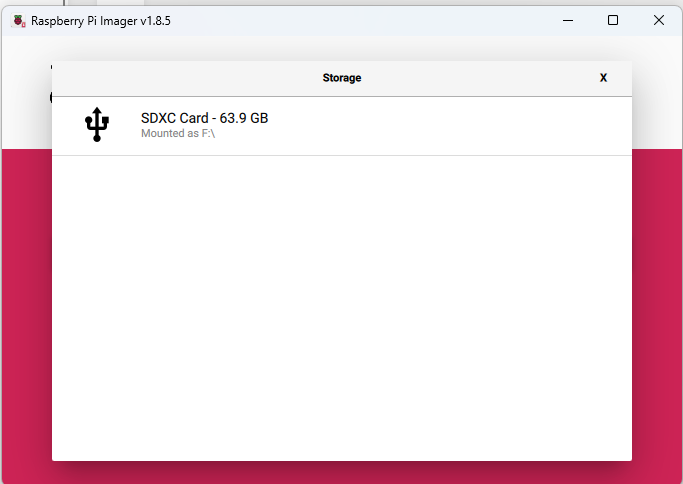
2. Next, select "Choose OS", "Other Specific-Purpose OS", "3D Printing", "OctoPi", and finally, "OctoPi (New Camera Stack)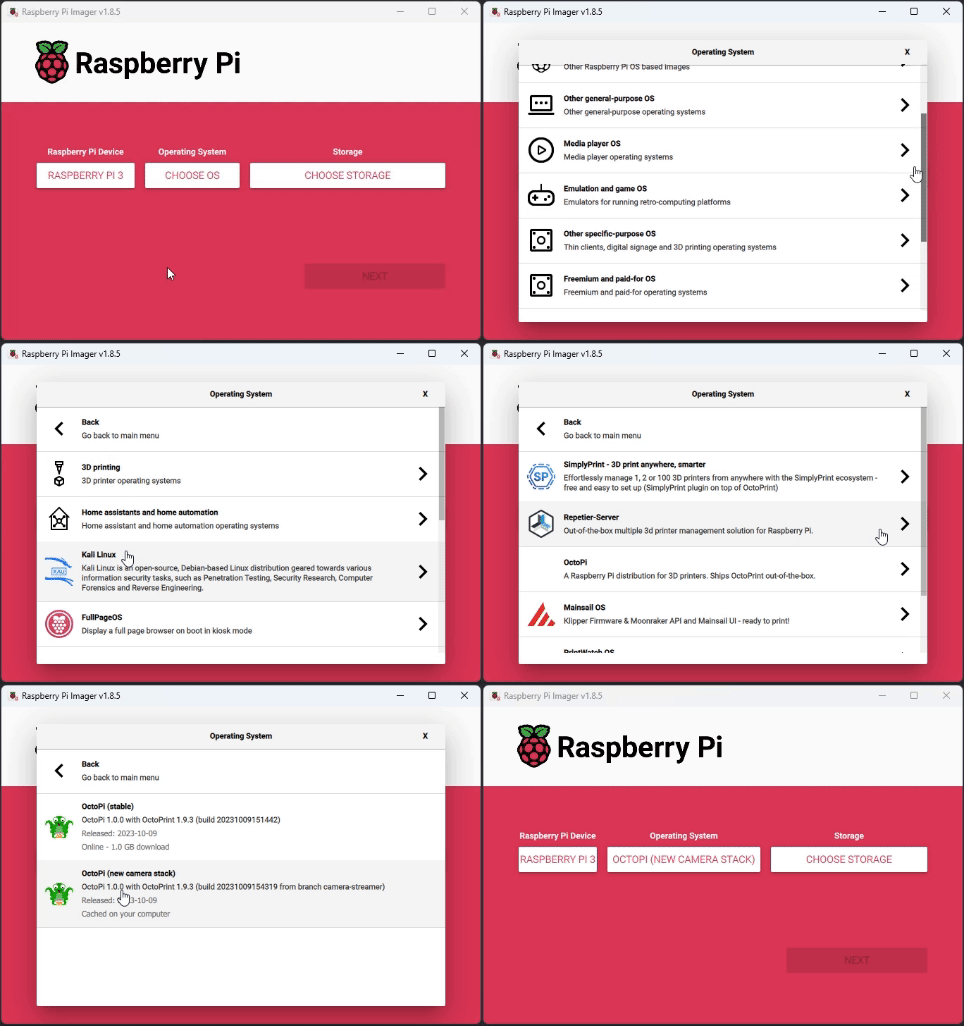 3. Lastly, select "Choose Storage", and then select the SD card.
4. To complete the basic configuration, select "Next".
Part 3: The Nitty-Gritty
You will not be using Wi-Fi for the tutorial. The Pi will be directly connected to the Dadeschools Ethernet ports with "-M", "-L1", "-L2", or "-L3" appended to the end.
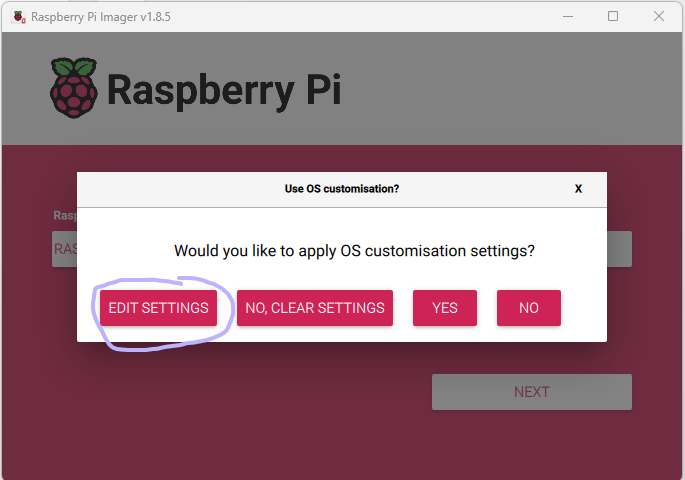
- After selecting "Next", you'll be met with this screen, Select "Edit Settings".
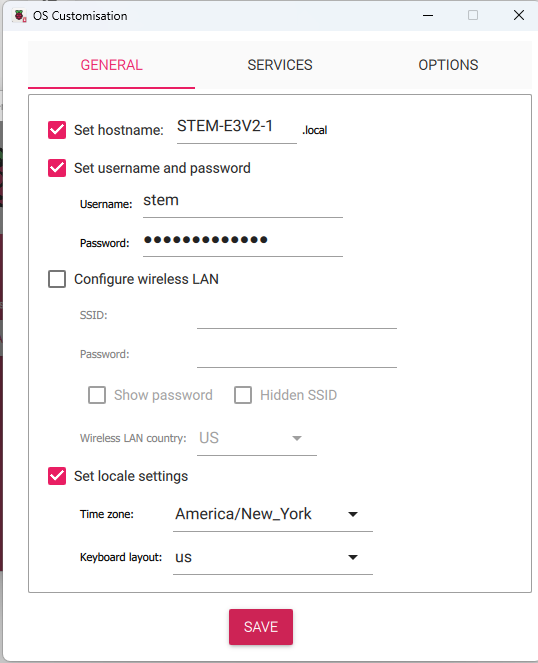
- General: Copy the following settings exactly:
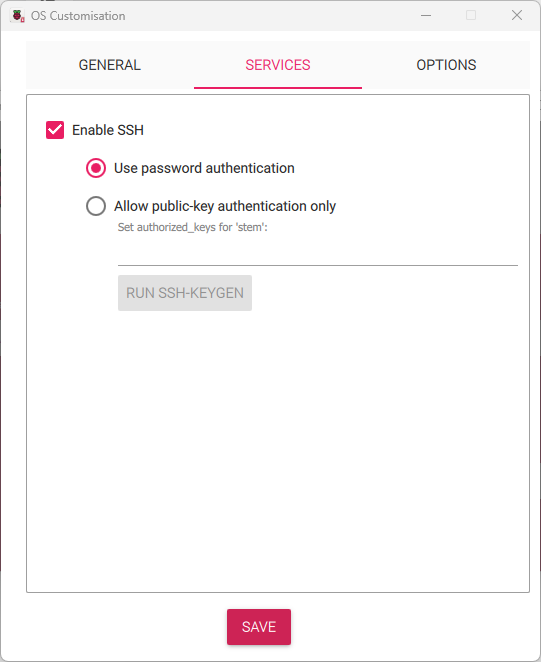
- Services: Copy the following settings exactly:
- Options: Do Not Change
Part 4. Cleanup
- Remove the SD Card from the computer, and insert it into the bottom SD Card reader on the Pi
With that, this portion of the tutorial is over. Move on to section 2 using the navigation buttons below.

No Comments