2. OctoPrint Inital Setup and Configuration
Part 1: Power On
Remember to use a decent power source for the Pi. A random iPhone or iPad charger will not have the ability to sustain the current required for the Pi. Use at lease a 5V 2.4A power brick.
- Plug the Raspberry Pi into the 3D printer using a USB-A to Micro-USB cable.
-
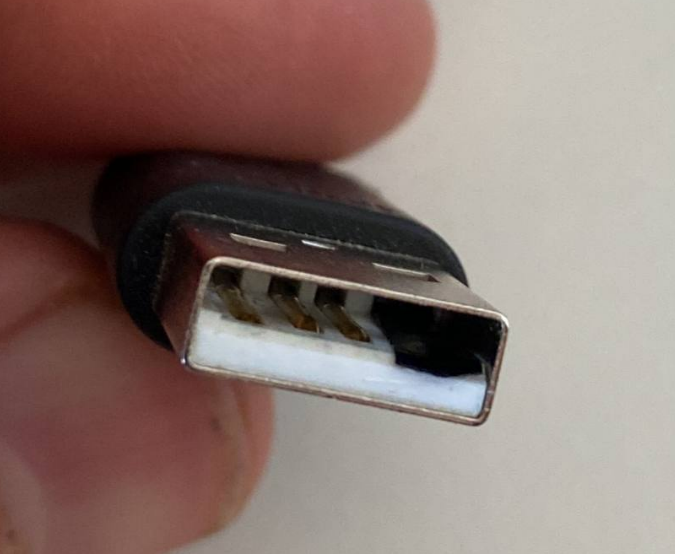
Making the following modification to the USB cable is MANDATORY!!! Ignoring these instructions could fry the printer, or the PI.
- Take a piece of electrical tape, and use tweezers to cover the 5V power pin as shown in the following image.
- This prevents backfeeding power to the printer, and providing power to it even if the power is off to the printer.
-
- Plug the Raspberry Pi into a network port.
- Using an ethernet patch cord, plug the Raspberry Pi's network port into one on the wall. If there is a network switch (hub) in place, plug the Pi into that.
-
Only port marked: "-M", "-L1", "-L2", and "-L3" will provide data to the Pi. DO NOT USE -V Ports.
- Plug the Raspberry Pi into power.
- Remember to use a power source with enough capacity for the Pi. Check the top of the page for guidelines.
- Plug a camera into the Pi. (Optional)
- Plug a camera into the Pi using a USB cable or the Pi's ribbon cable interface.
Done! - At this point, wait 6 minutes until following the next steps.
Part 2: Logging In
- On your web browser (Edge, Chrome, Firefox), enter the website: http://STEM-E3V2-<PRINTERID>.local
-
Remember to change the PRINTERID to the one you set while imaging.
-
If the aforementioned address did not work, you can try: https://STEM-E3V2-<PRINTERID> -Omitting the ".local"
-
- You should be met with this screen.
